
These homemade diffuser ornaments are a great project to make with family and friends. Once the ornaments dry, you can add pine or holiday-scented essential oils to them to make your Christmas tree smell amazing. These are particularly great for those who have a fake tree but want the smell of a Christmas tree in their home.
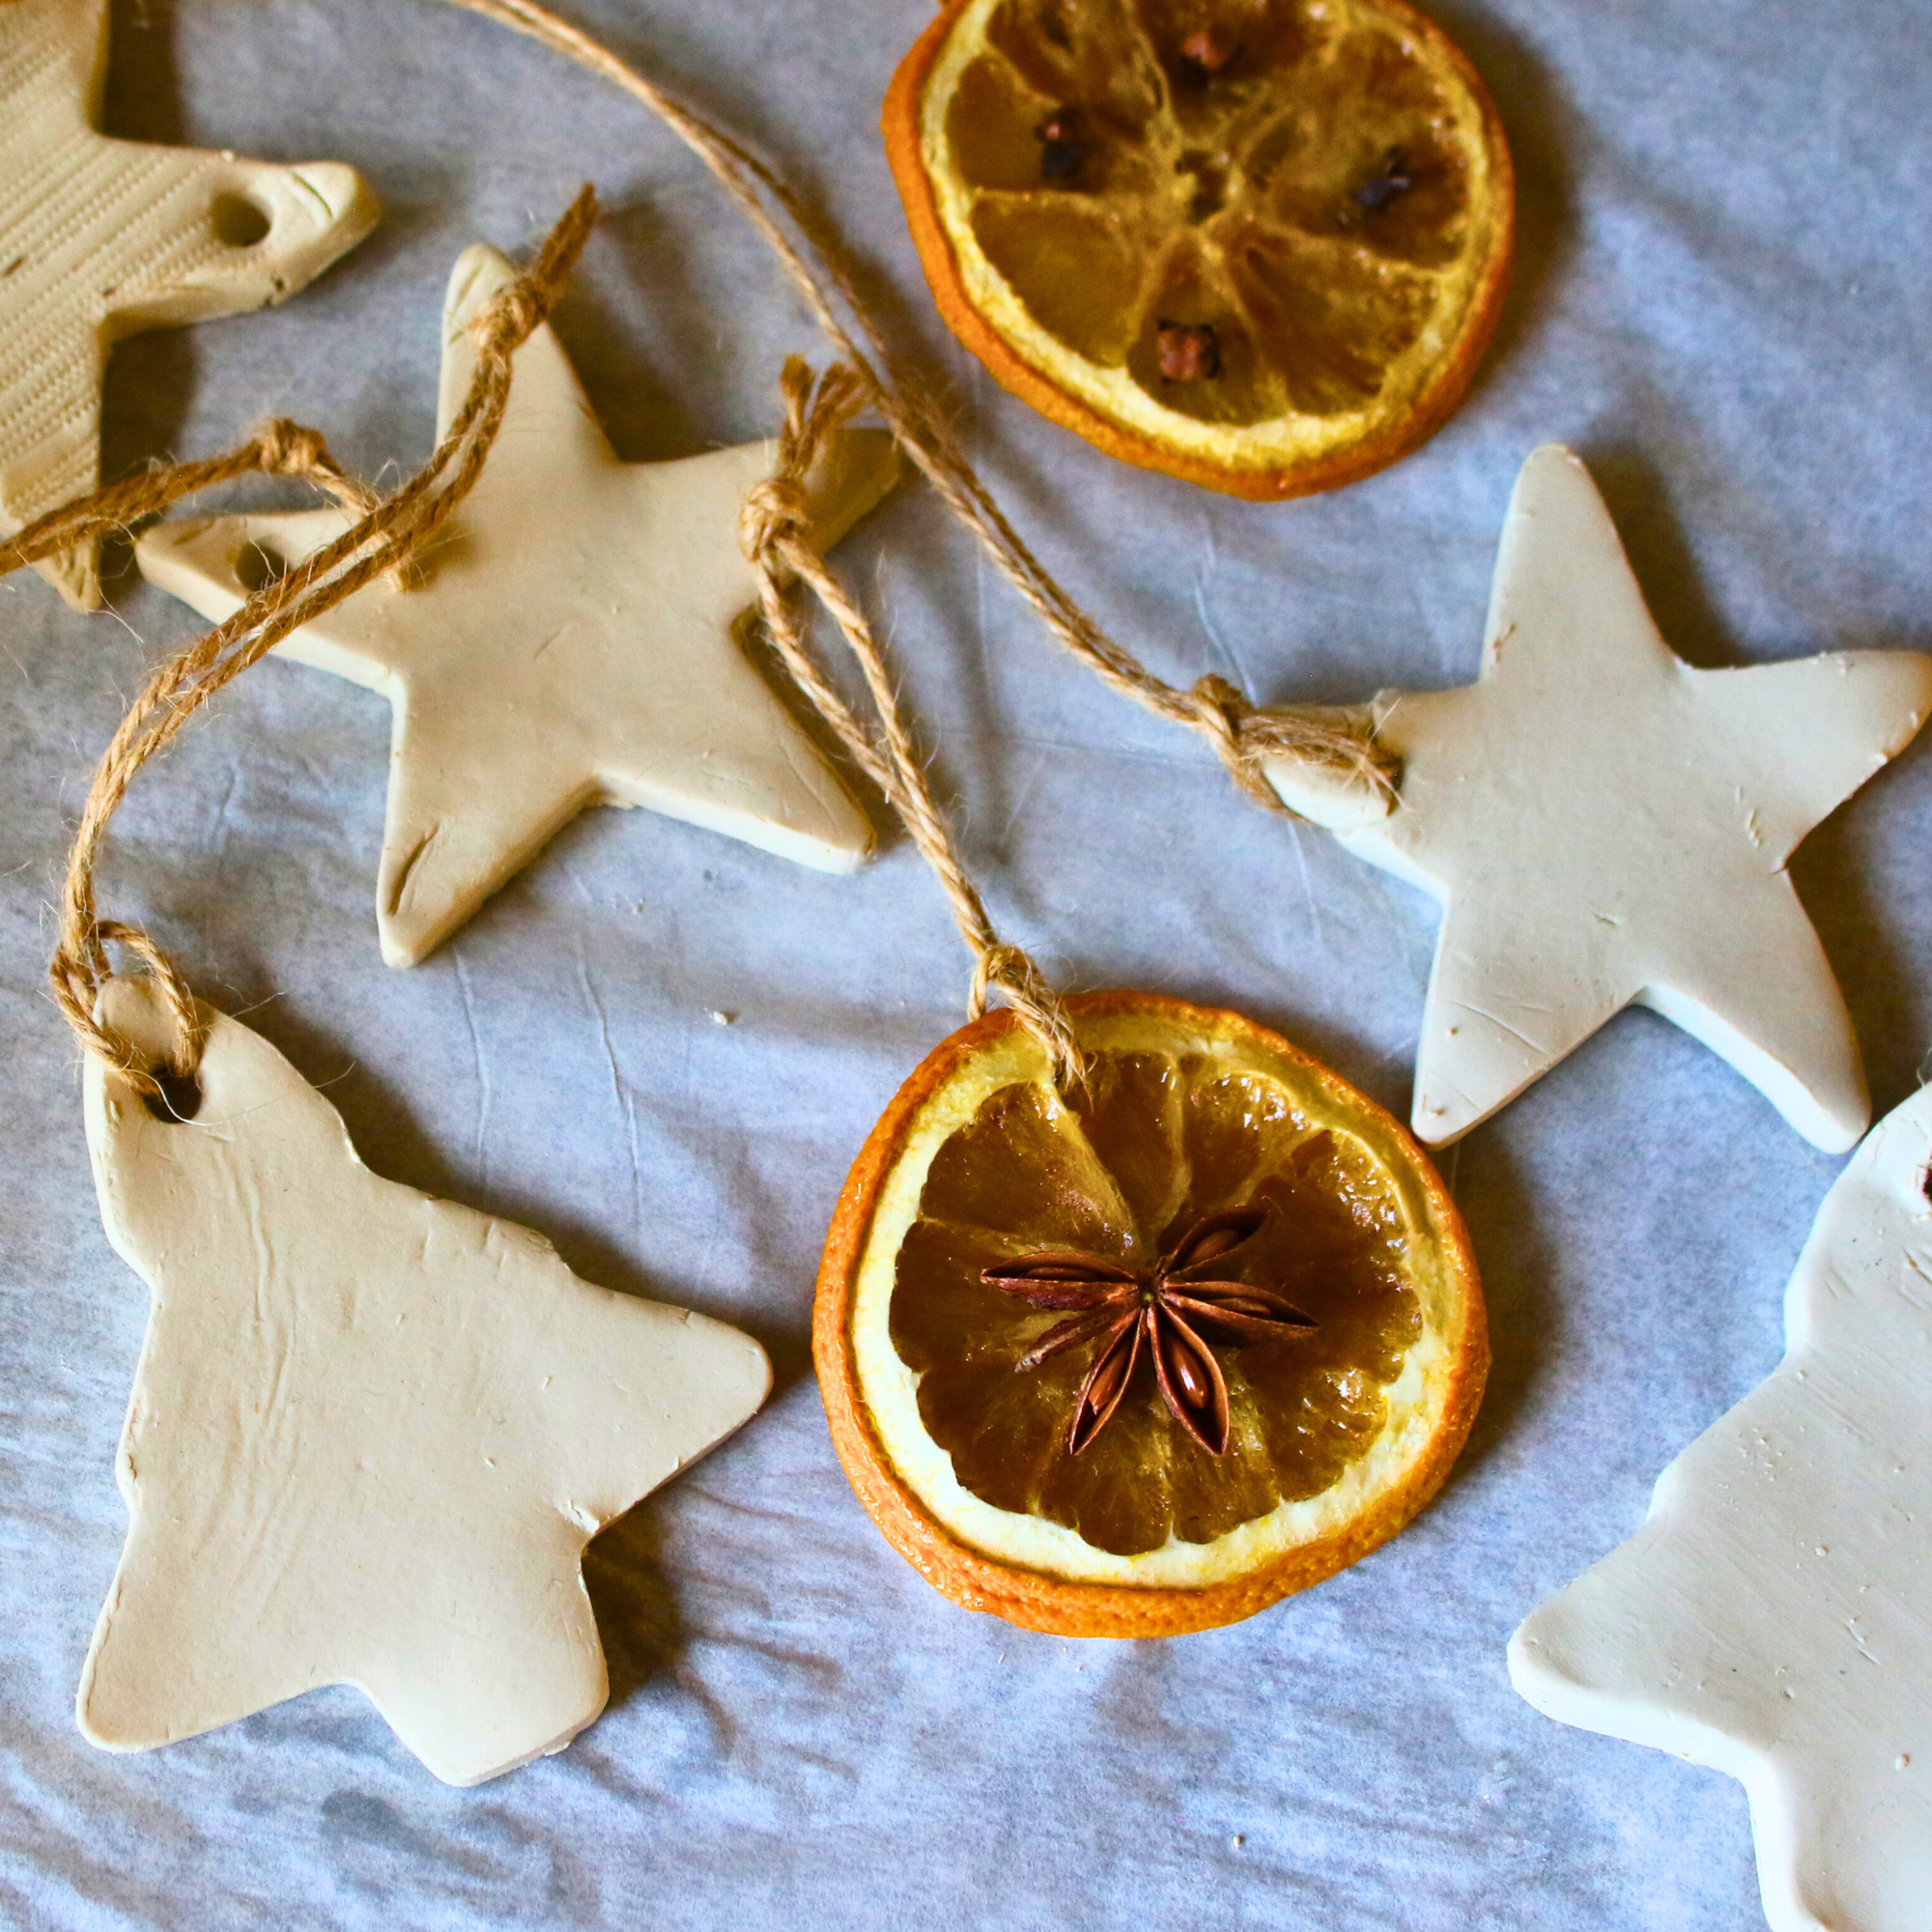
These DIY diffuser ornaments are a heartfelt way to add a personal, aromatic touch to your holiday season. Whether you gift them to loved ones or enjoy them on your own tree, they’re sure to become a cherished part of your holiday traditions.
The ornaments are versatile—leave them white for a classic, minimalist look, or paint them to match your holiday décor. With just a few materials and a little time, you’ll have handmade ornaments that elevate the holiday spirit in your home.
What You’ll Need To Make Diffuser Ornaments
- Air-Dry Clay (Purchase here)
- Twine (Purchase here)
- Rolling Pin
- Holiday Cookie Cutters (stars and trees work beautifully!)
- Pencil or Skewer
How to Make Homemade Diffuser Ornaments
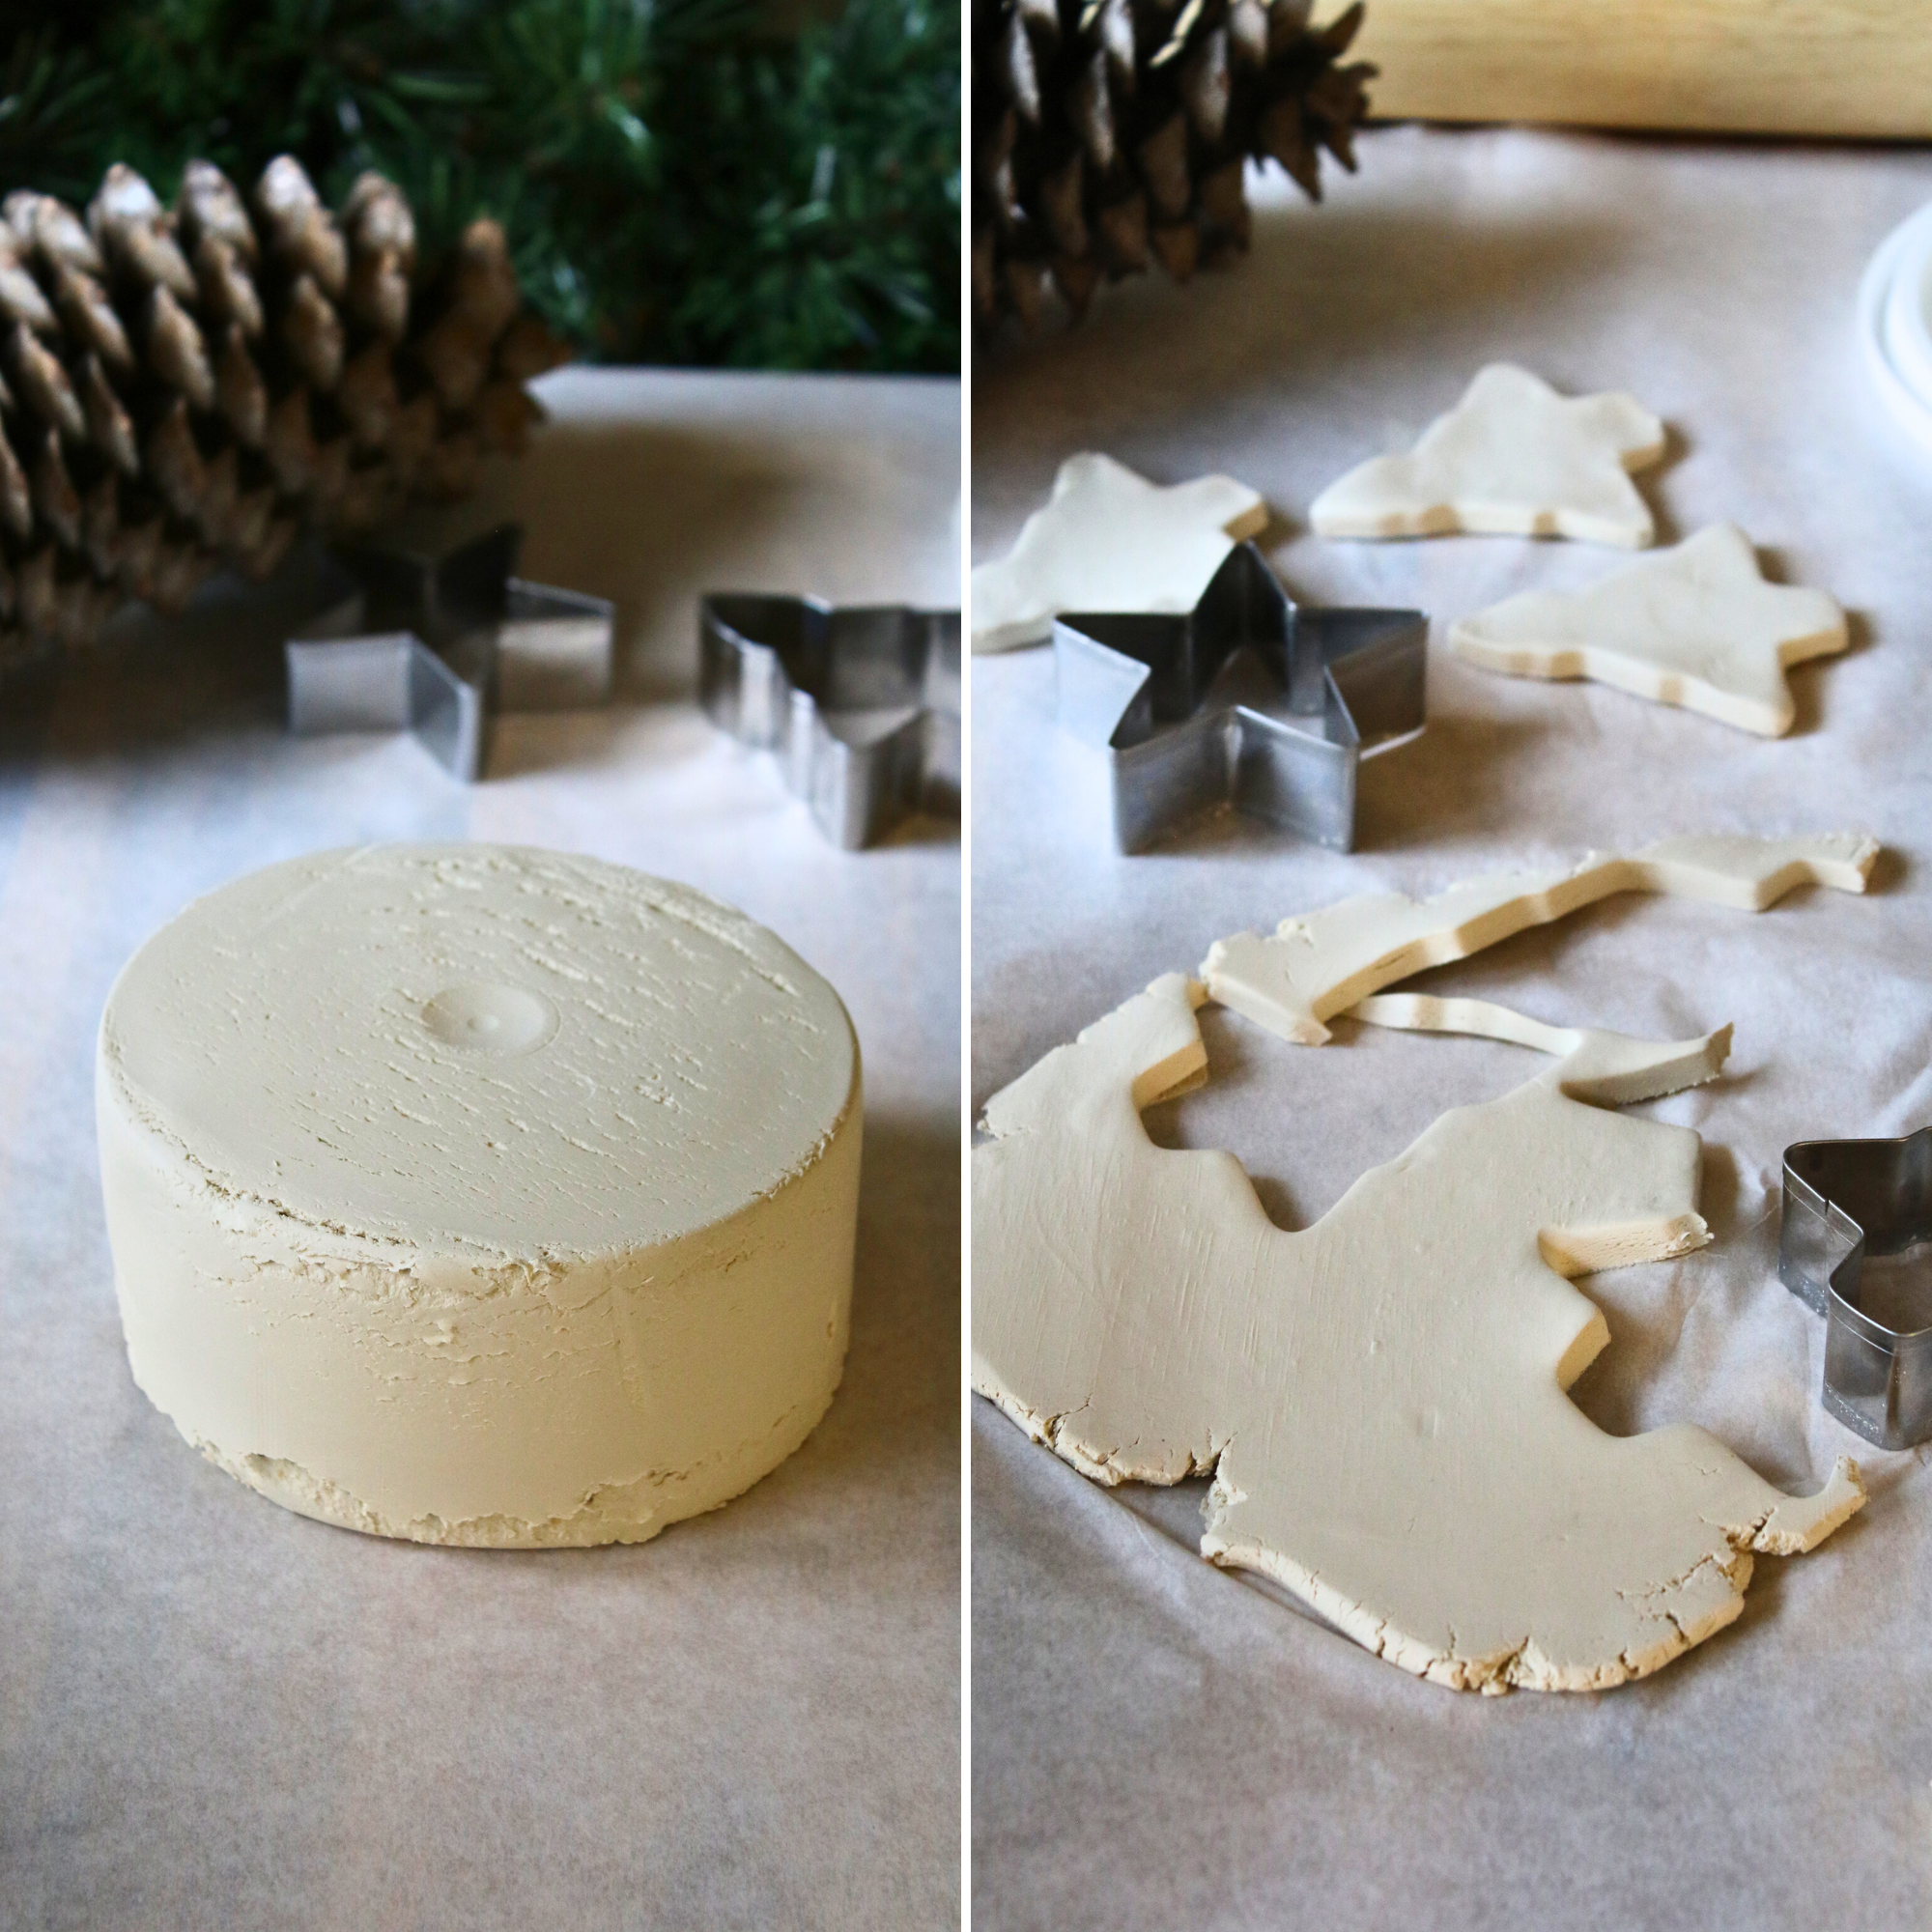
- Prepare the Clay: Roll out your air-dry clay to a thickness of ¼ to ½ inch. For a smooth finish, place wax or parchment paper over the clay and roll over it gently.
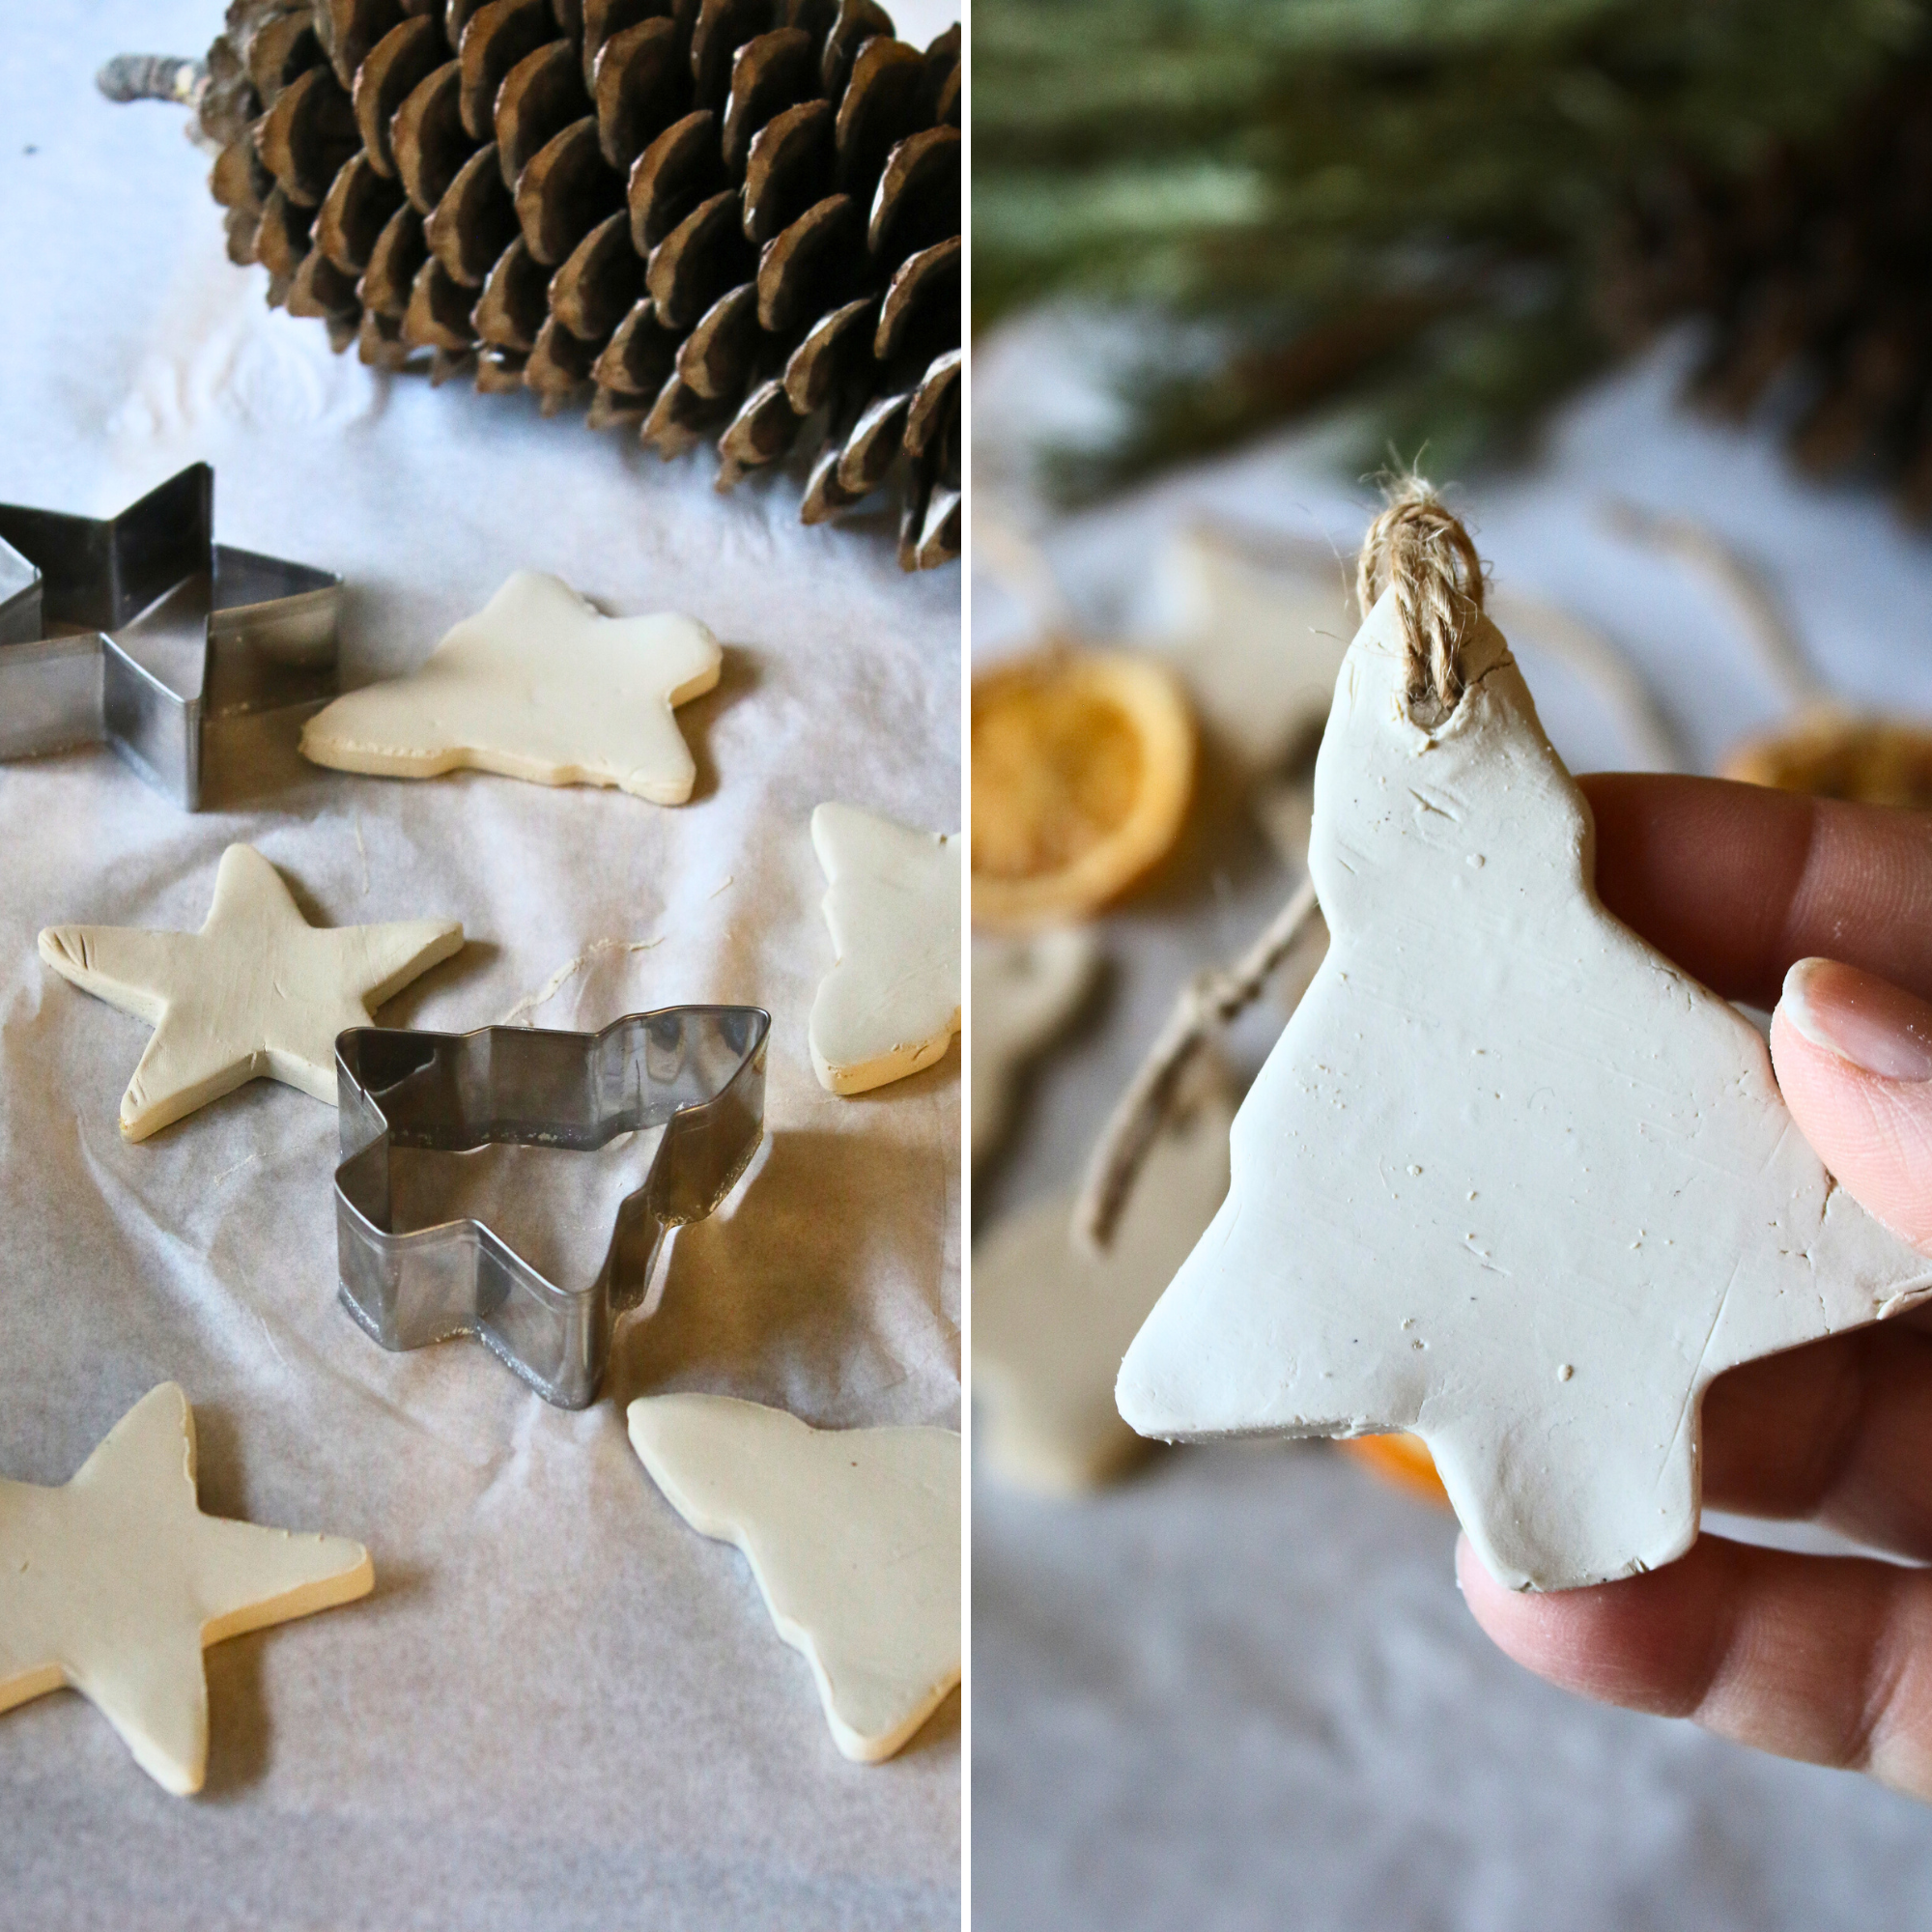
- Cut Your Shapes: Use holiday-themed cookie cutters to cut out festive shapes like stars, trees, or evensnowflakes.
- Make a Hanging Hole: Use a pencil or skewer to create a hole at the top of each ornament for the twine.
- Dry the Ornaments: Place the cut-out ornaments on a lined cookie sheet and let them air-dry for 1-2 days. Thicker ornaments may take longer to dry completely.
- Optional Painting: Once the ornaments are fully dried, paint them with holiday colors or designs if desired. Let the paint dry completely before moving to the next step.
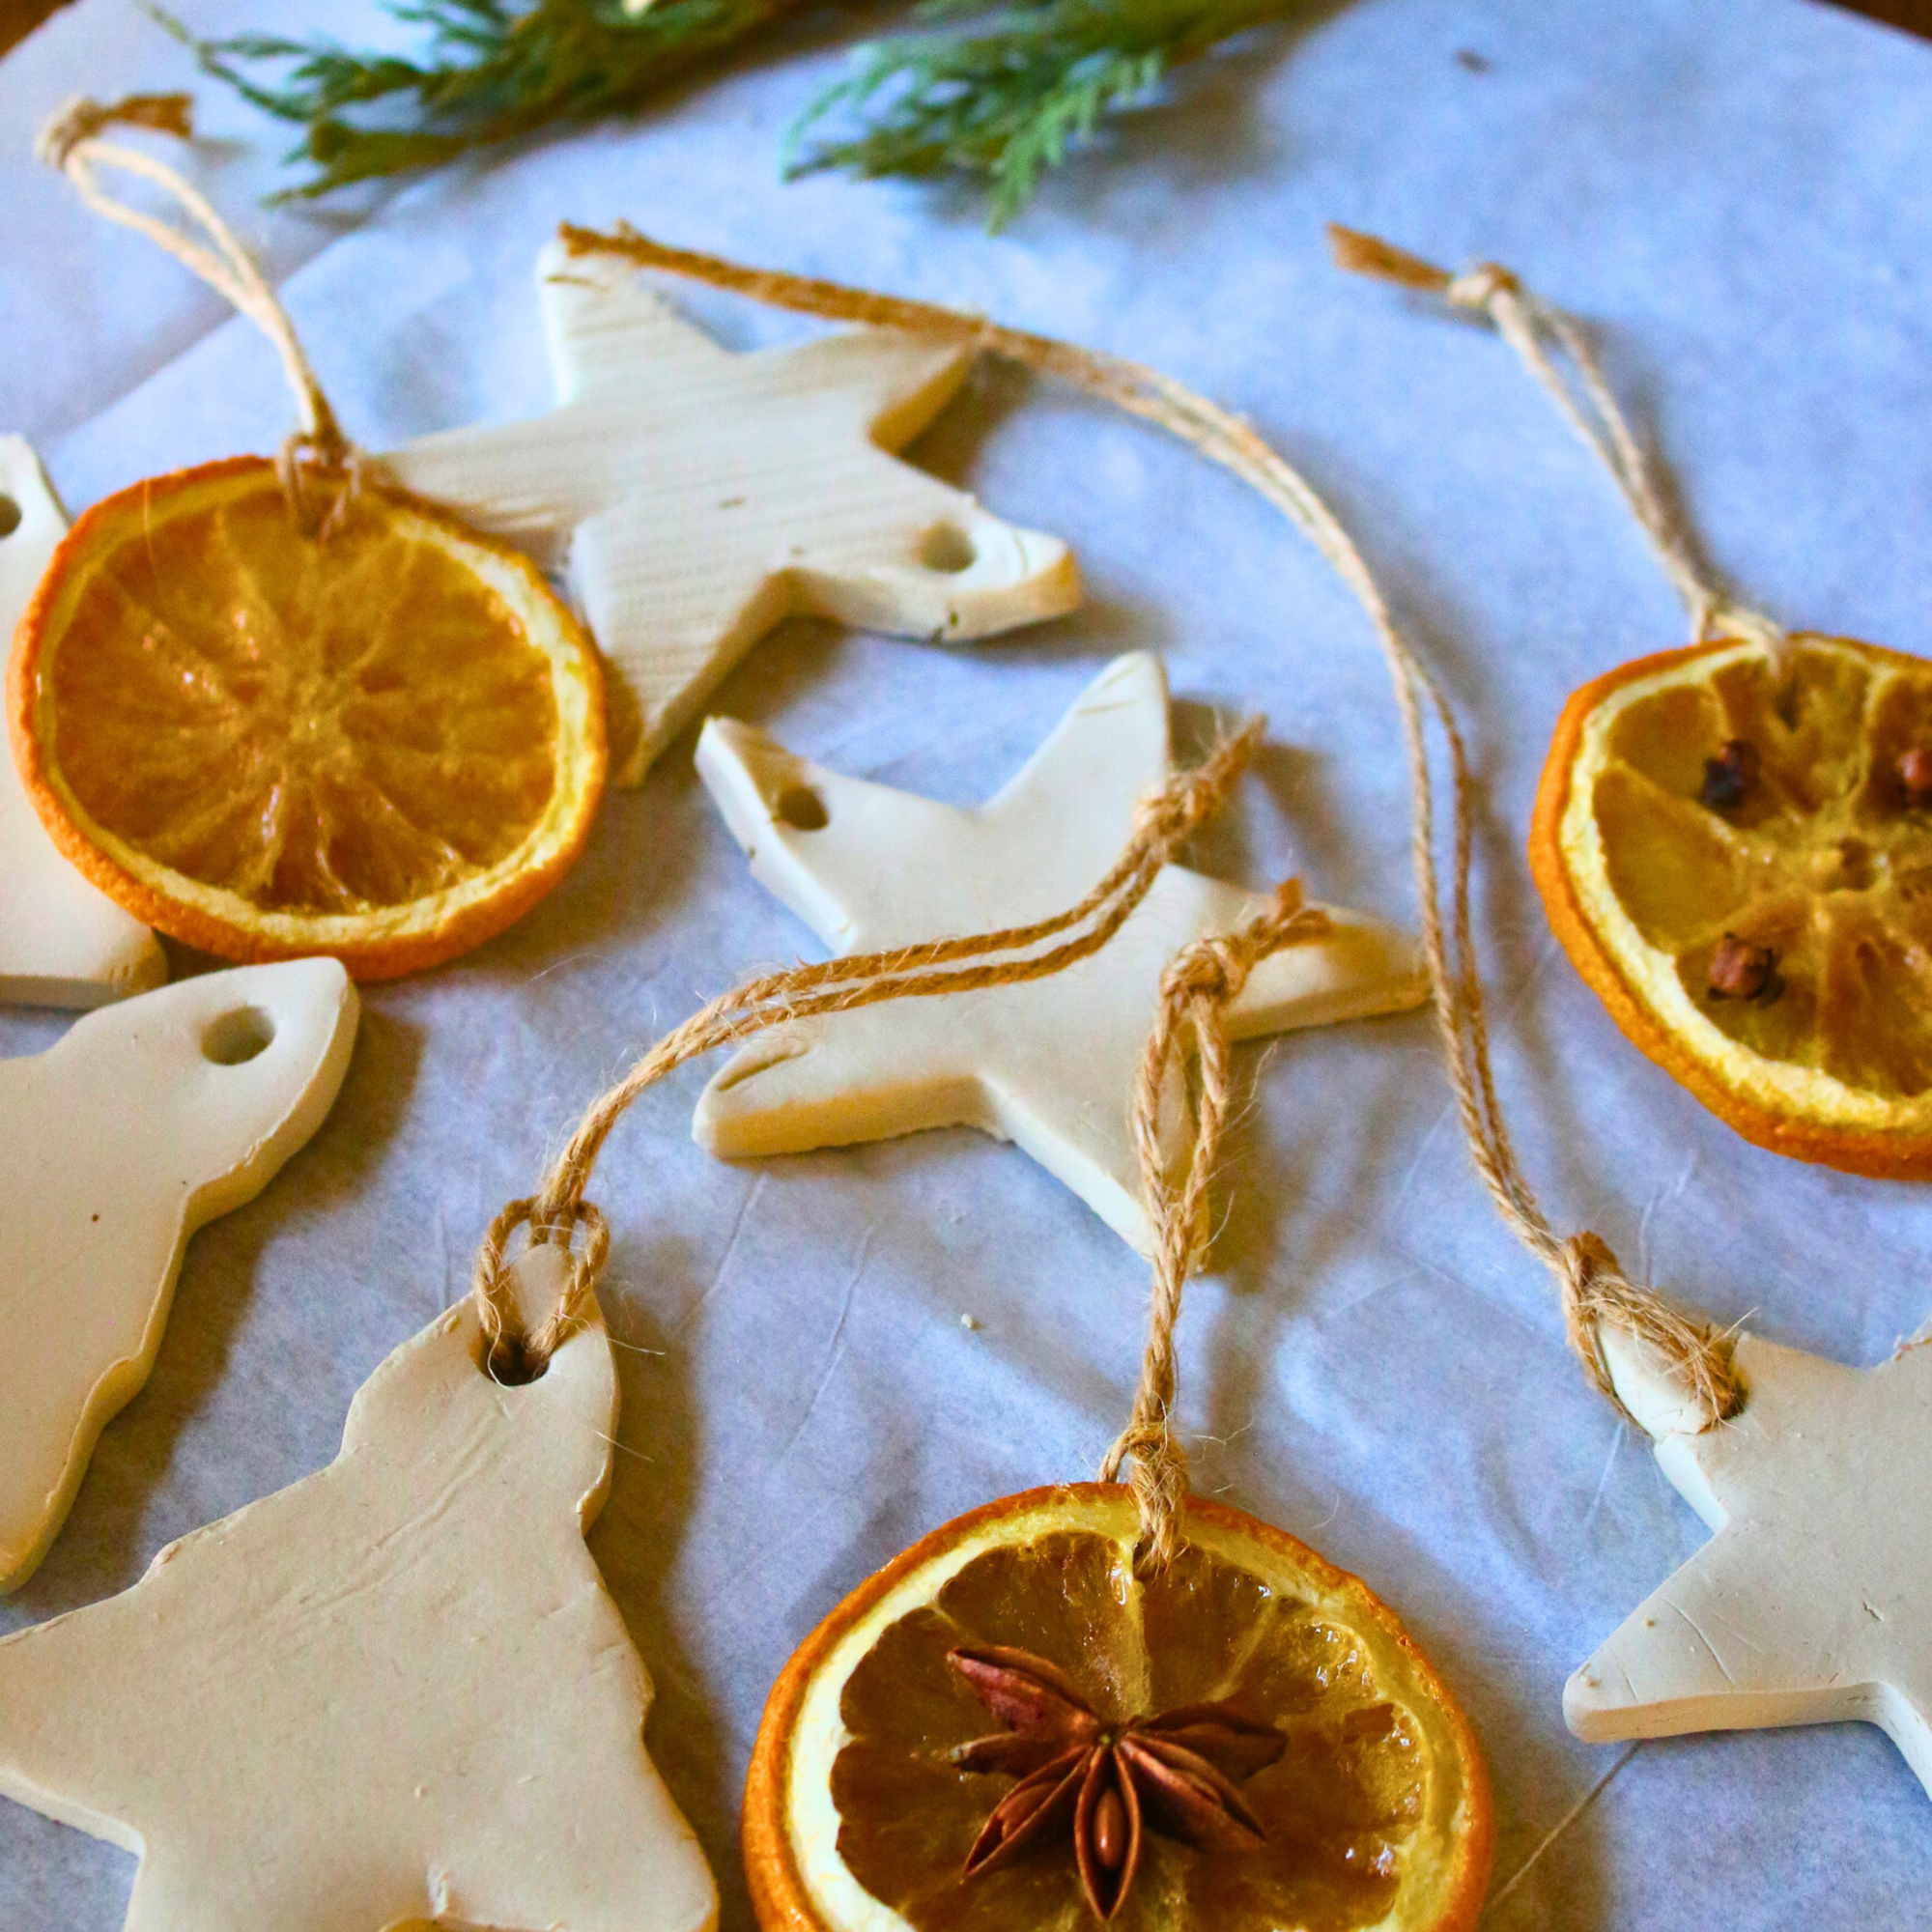
- Add the Twine: String the twine through the hole and tie a knot to create a loop for hanging.
- Scent Your Ornaments: Add 1-2 drops of your favorite essential oil to each ornament. Pine, cedarwood, or cinnamon scents work wonderfully for a festive touch.
- Hang and Enjoy: Hang the ornaments on your tree and enjoy the fragrant, personalized charm they bring to your holiday decor.
Diffuser Ornaments FAQs
Can I use another type of clay for this project?
Air-dry clay is recommended because it’s easy to work with and doesn’t require baking. You can use white clay, colored, or terra cotta air-dry clay for this project.
How long does the scent last on the ornaments?
The scent from the essential oils typically lasts 2-3 days. Simply add more drops to refresh the aroma as needed.
What are some other uses for these ornaments?
Besides hanging them on the tree, these ornaments make beautiful gift tags, scented drawer sachets, or holiday decor for wreaths and garlands.
Can I store the ornaments for next year?
Yes! To reuse the ornaments, store them in a dry place. Next year, you can reapply essential oils to refresh the scent.
Related Articles:
- 112 Essential Oils: The Ultimate Guide
- How To Clean Your Home with Essential Oils
- 14 Homemade Gifts Made With Essential Oils
- How To Make Dried Orange Slices

Essential Oil Diffuser Ornaments
These homemade diffuser ornaments are a great project to make with family and friends.
- Prep Time: 5 minutes
- Cook Time: 1-2 days drying
- Total Time: 2 days
- Yield: 10-20
- Category: DIY
- Cuisine: NA
Ingredients
- Air-Dry Clay (Purchase here)
- Twine (Purchase here)
- Rolling Pin
- Holiday Cookie Cutters (stars and trees work beautifully!)
- Pencil or Skewer
Instructions
- Prepare the Clay: Roll out your air-dry clay to a thickness of ¼ to ½ inch. For a smooth finish, place wax or parchment paper over the clay and roll over it gently.
- Cut Your Shapes: Use holiday-themed cookie cutters to cut out festive shapes like stars, trees, or even snowflakes.
- Make a Hanging Hole: Use a pencil or skewer to create a hole at the top of each ornament for the twine.
- Dry the Ornaments: Place the cut-out ornaments on a lined cookie sheet and let them air-dry for 1-2 days. Thicker ornaments may take longer to dry completely.
- Optional Painting: Once the ornaments are fully dried, paint them with holiday colors or designs if desired. Let the paint dry completely before moving to the next step.
- Add the Twine: String the twine through the hole and tie a knot to create a loop for hanging.
- Scent Your Ornaments: Add 1-2 drops of your favorite essential oil to each ornament. Pine, cedarwood, or cinnamon scents work wonderfully for a festive touch.
- Hang and Enjoy: Hang the ornaments on your tree and enjoy the fragrant, personalized charm they bring to your holiday decor.
Notes


Leave a Comment