Did you know making your own butter at home is super simple? I had no idea! I figured I would need milk fresh from the cow, and an old-timey churning gadget, which I would then toil on for hours…. Nope! I pretty much just needed cream and an electric beater! Hooray for modern technology.
Turns out, butter can be made from heavy cream if you agitate it for long enough that the fat separates from the liquid, and you end up with butter and buttermilk. You can agitate it a few different ways.
- Put it in a jar with the lid on, and shake it until the butter fat separates from the buttermilk.
- Put it in a bowl and use an electric hand mixer to whip it until the butterfat separates from the buttermilk.
- Put it in a food processor and blend until the butterfat separates from the buttermilk.
Option 2 sounded the most fun, so I went with that. Option 1 sounded way too labor intensive, and 3 sounded too uninvolved. So, let me take you through my process!
What Kind Of Cream Should I Use To Make Butter?
Heavy or whipping cream is the easiest cream to make butter from, as it has the highest fat percentage. More fat means more butter at the end of the process! You can make it from lower-fat cream, but you will need more volume to make the same amount of butter.
I found a heavy cream from Ireland, with about 35% fat. I LOVE Irish butter, so I figured it would be perfect.
You should also make sure the cream does not contain additives like sugar, which some whipping cream does. That will make the butter taste odd.

Do I Need Any Special Equipment To Make Butter At Home?
You will need an electric hand mixer, a deep mixing bowl, and another bowl full of iced water for this recipe. Nothing fancy at all, but I got stuck without ice as I forgot to prepare it in advance, so I pre-filled a bowl of water and whacked it in the freezer while making the butter, which worked okay.
Ingredients To Make Butter At Home
- 2 cups of heavy cream or whipping cream.
- ¼ teaspoon of salt, or more if you love salty butter.
How To Make Butter At Home
Pour 2 cups of heavy cream and the salt into your mixing bowl.
Blend with your electric hand mixer.
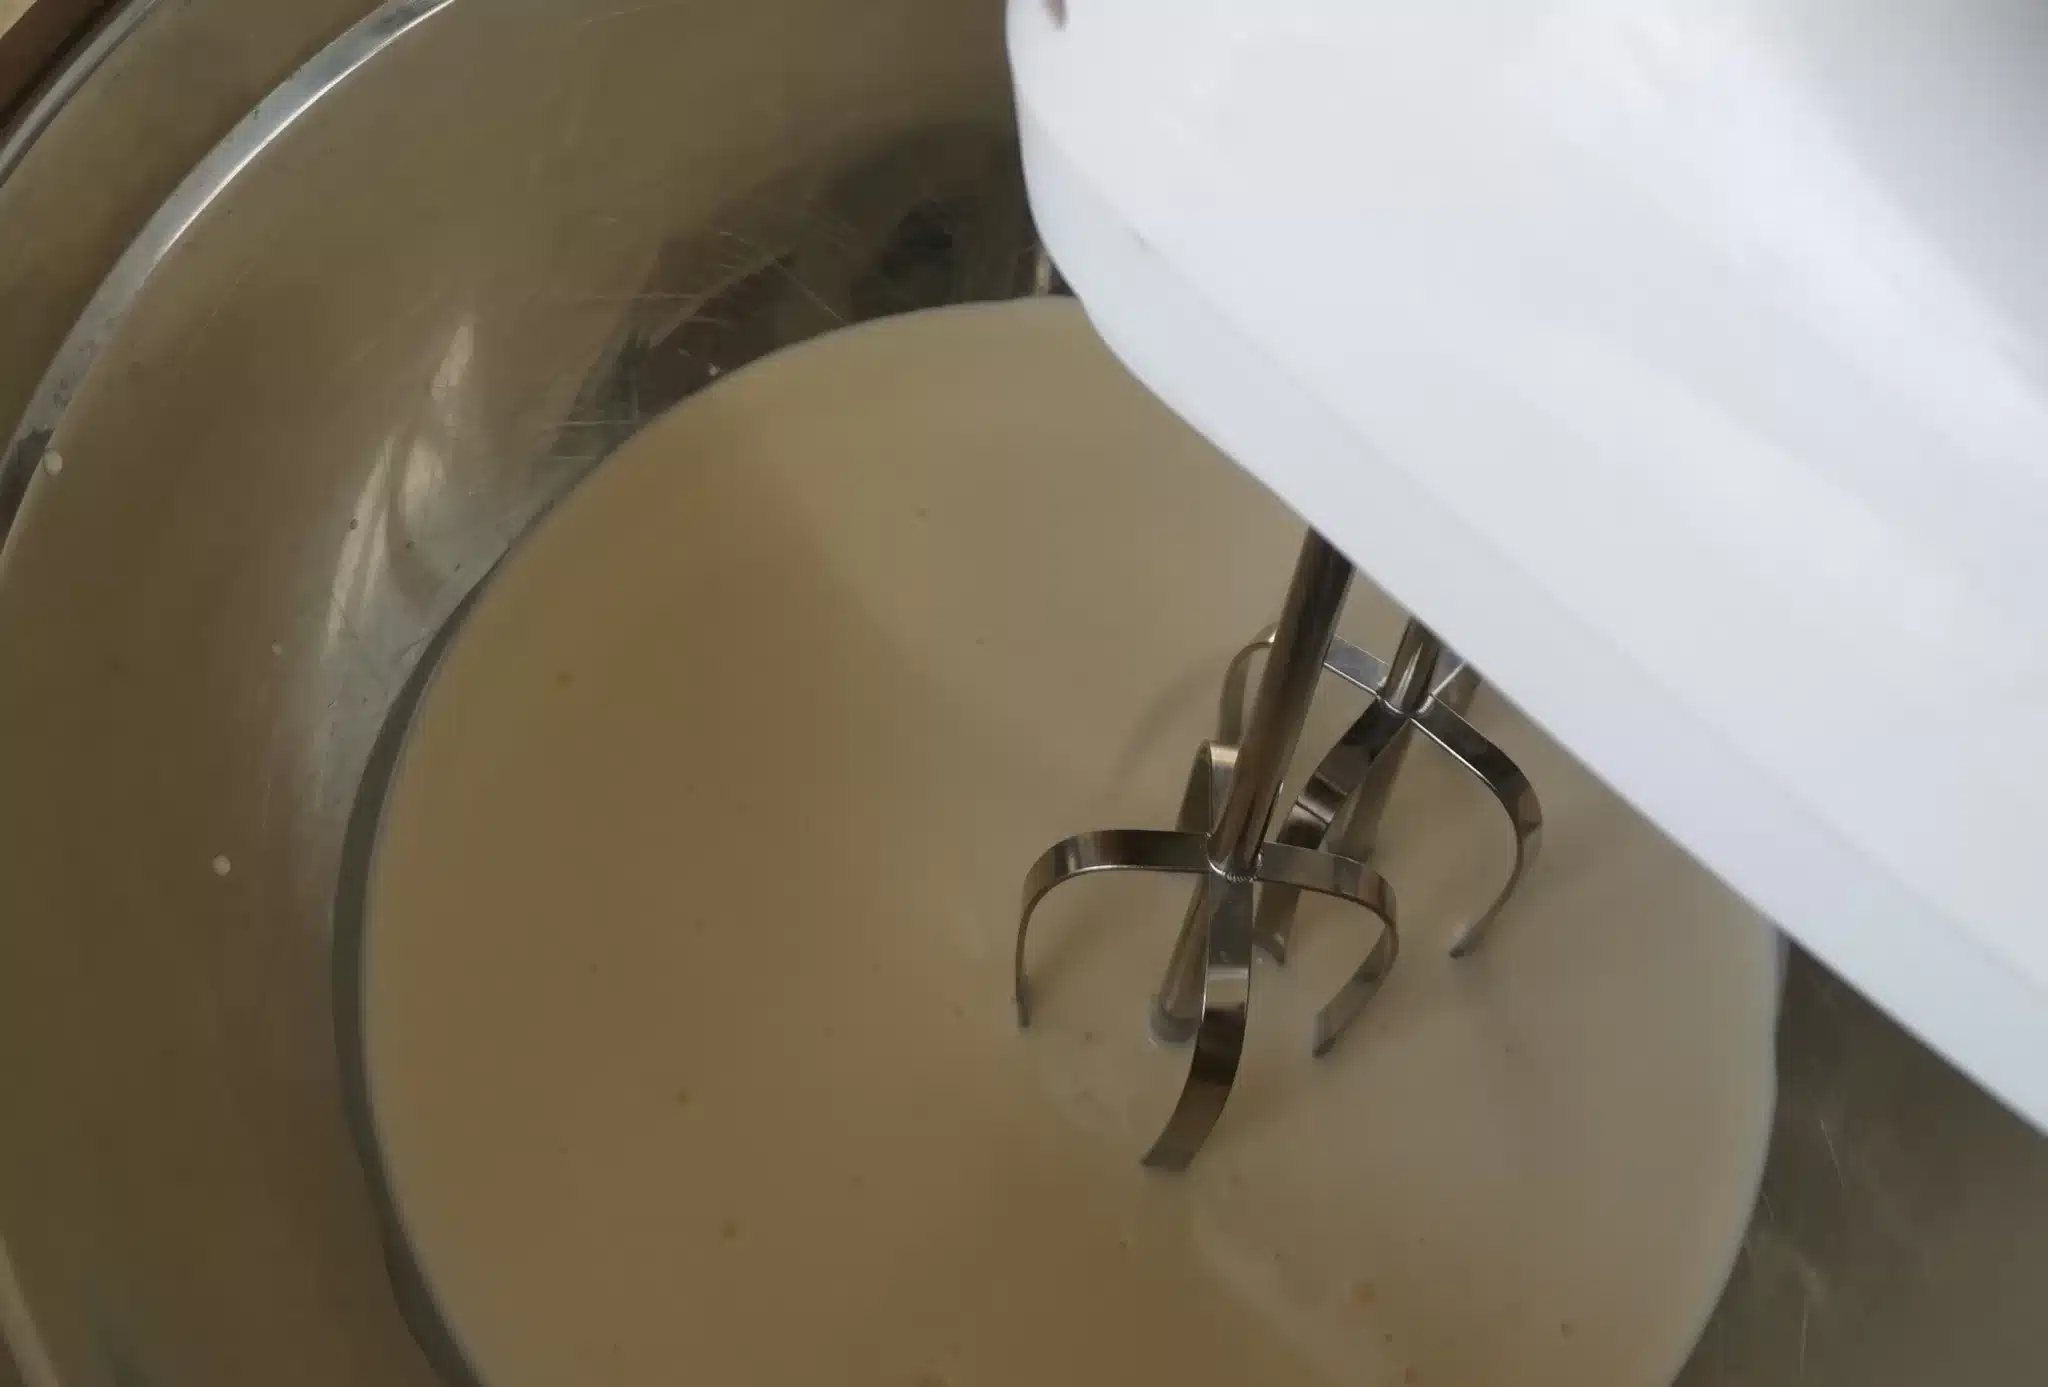
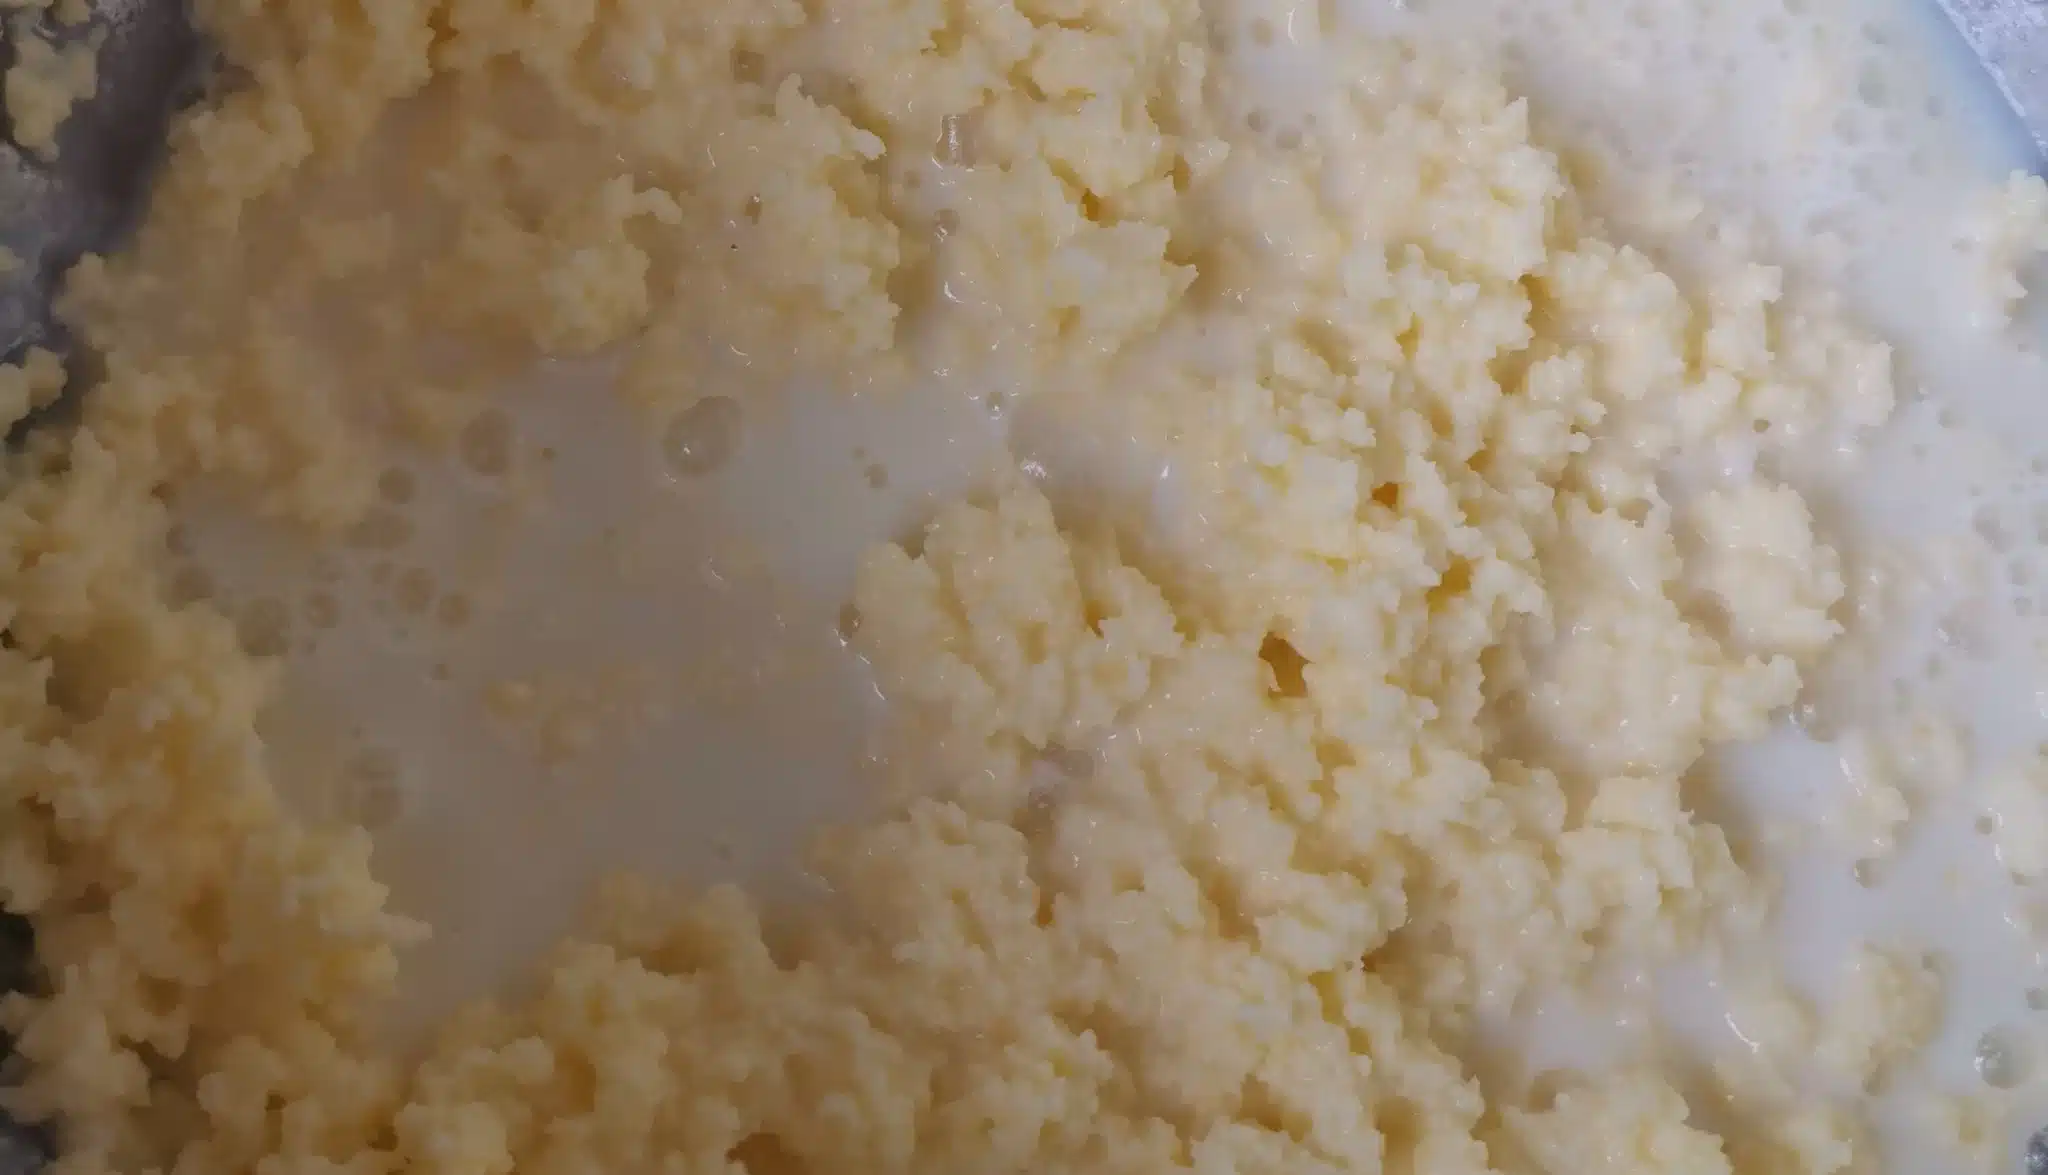
Continue to blend past the point of stiff peaks in the cream until you see it turn yellow and separate from the buttermilk. This took me 16 minutes of continuous whipping to achieve.
Cream after 10 minutes:
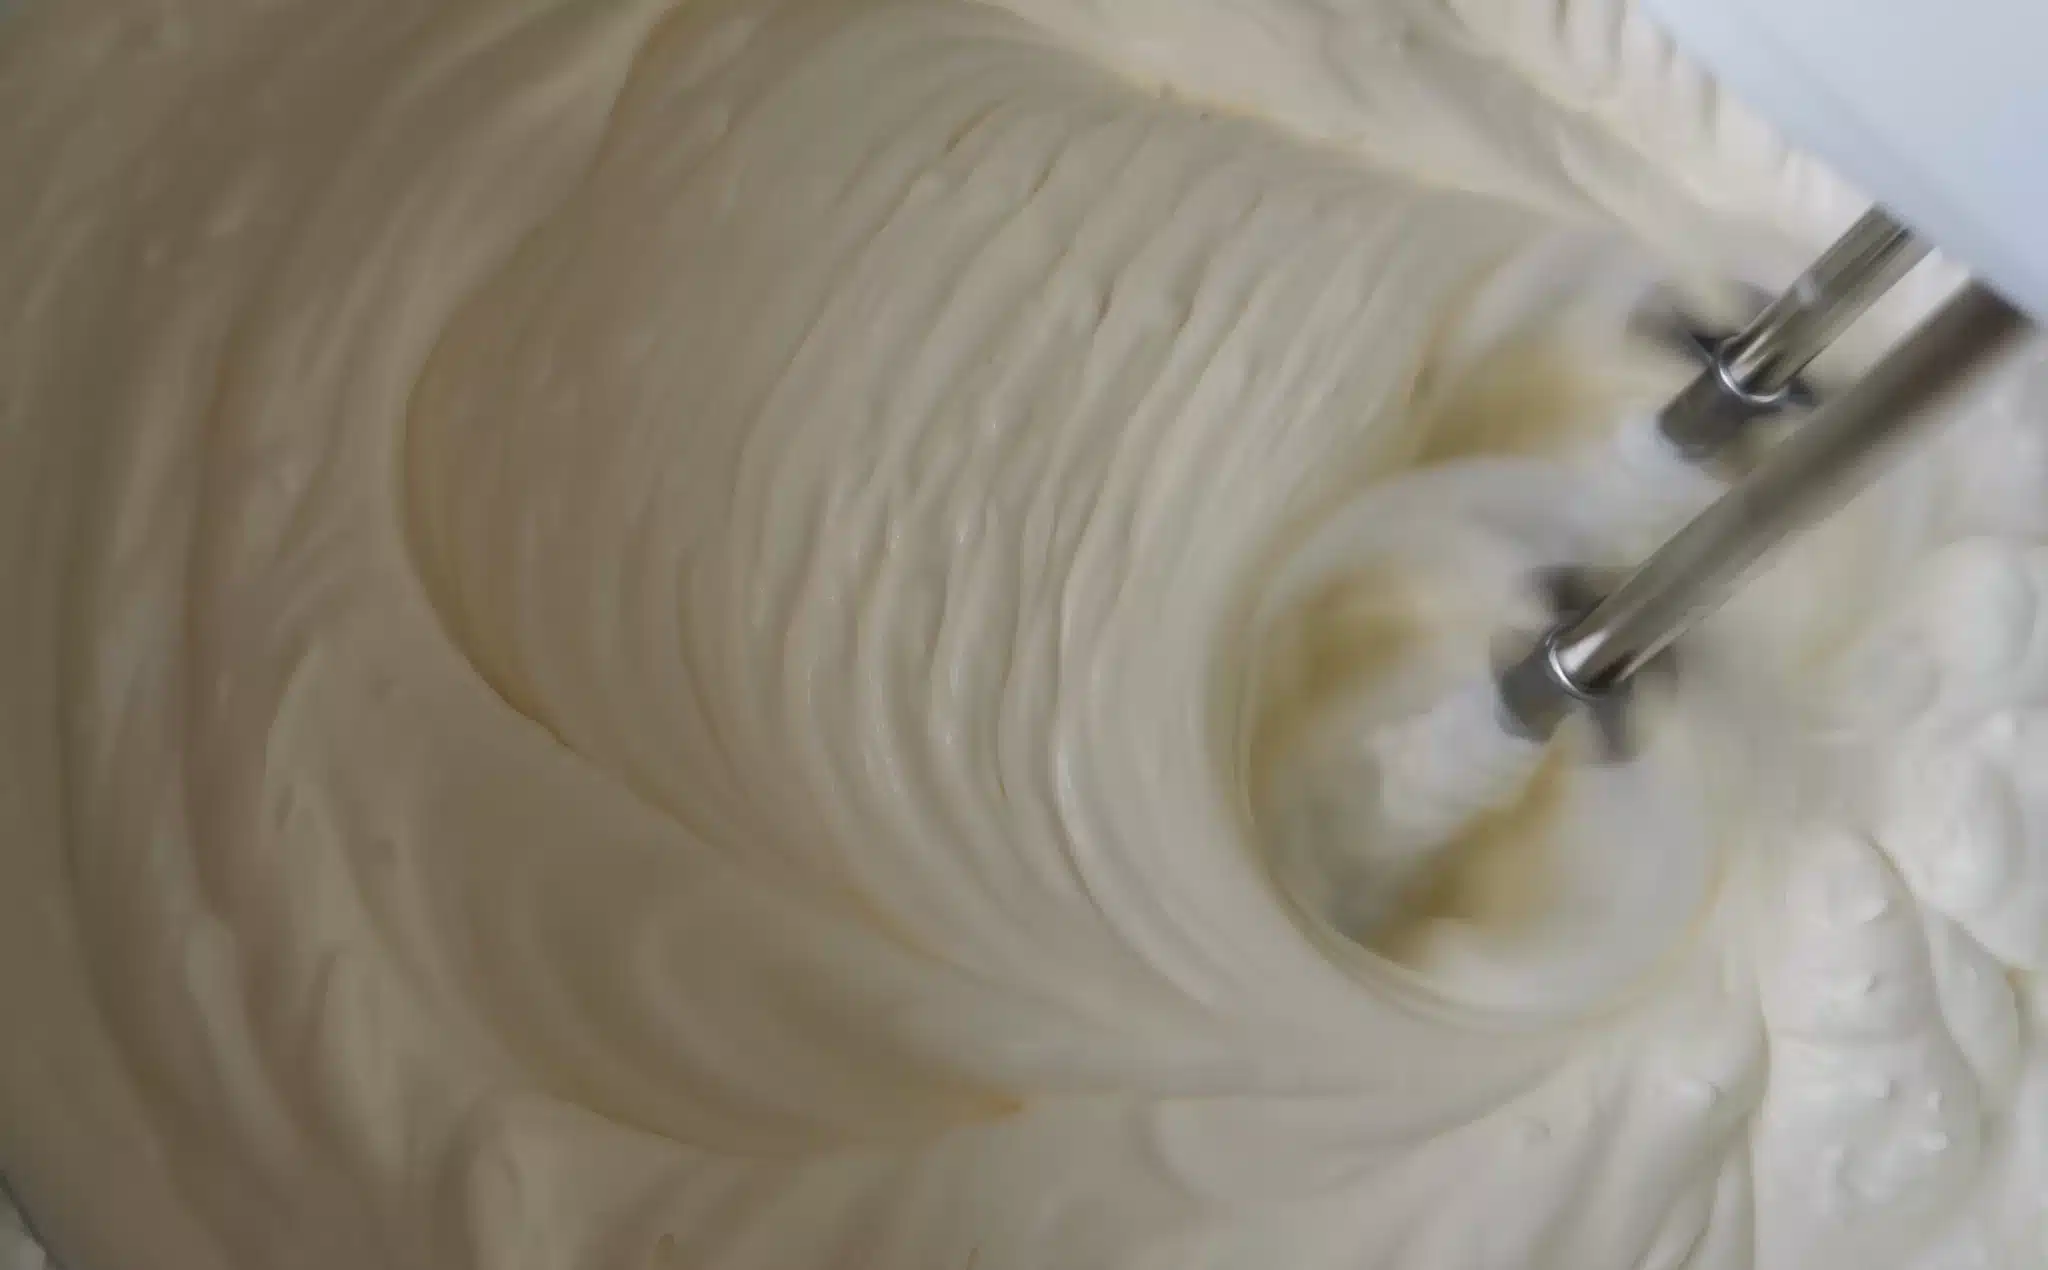
Cream after 12 minutes:
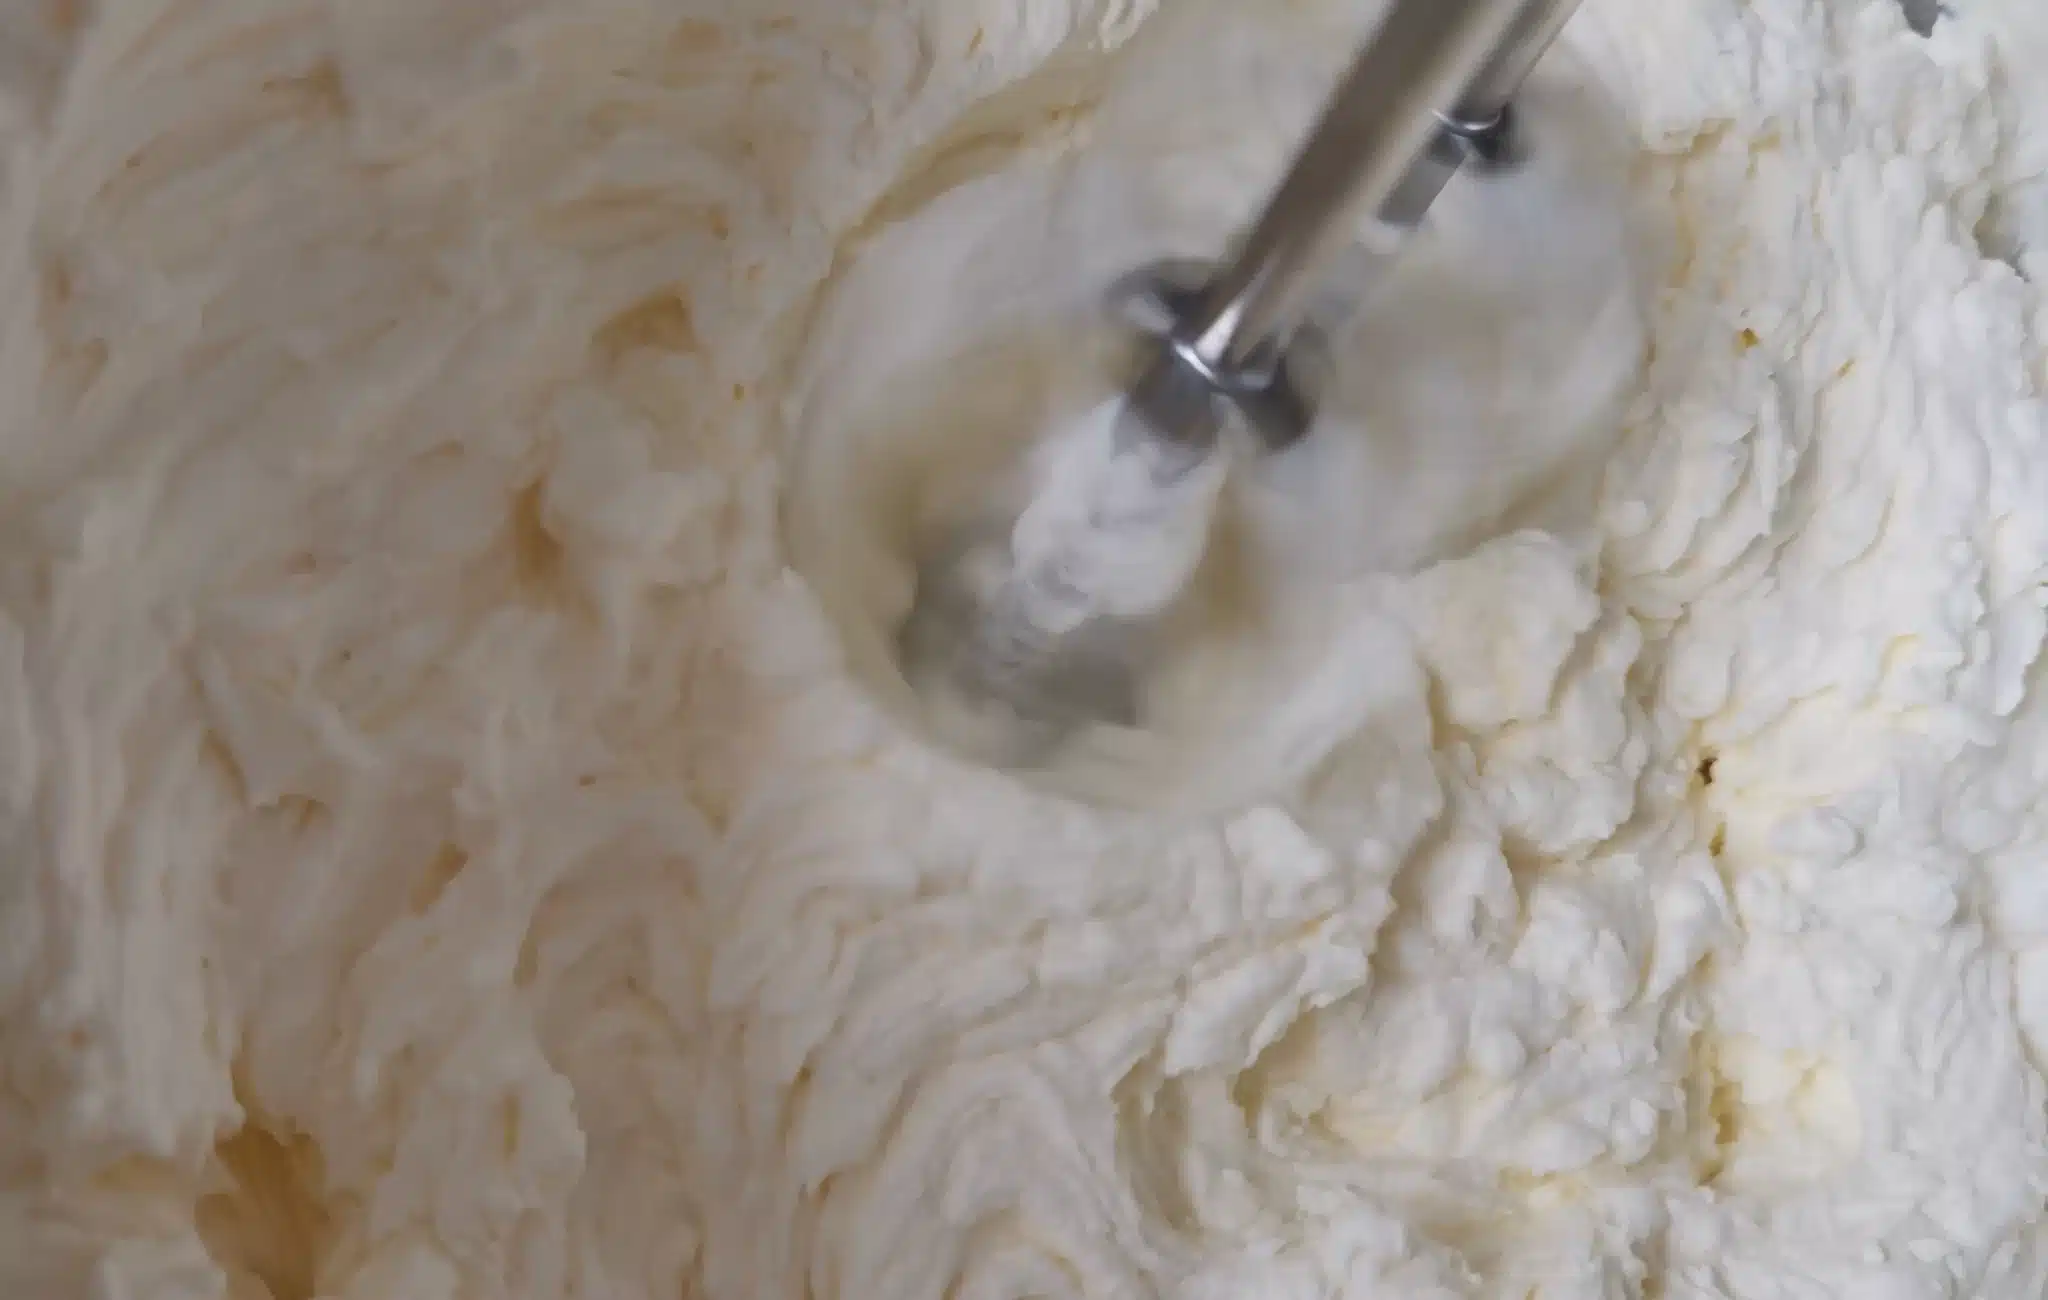
Cream after 15 minutes:
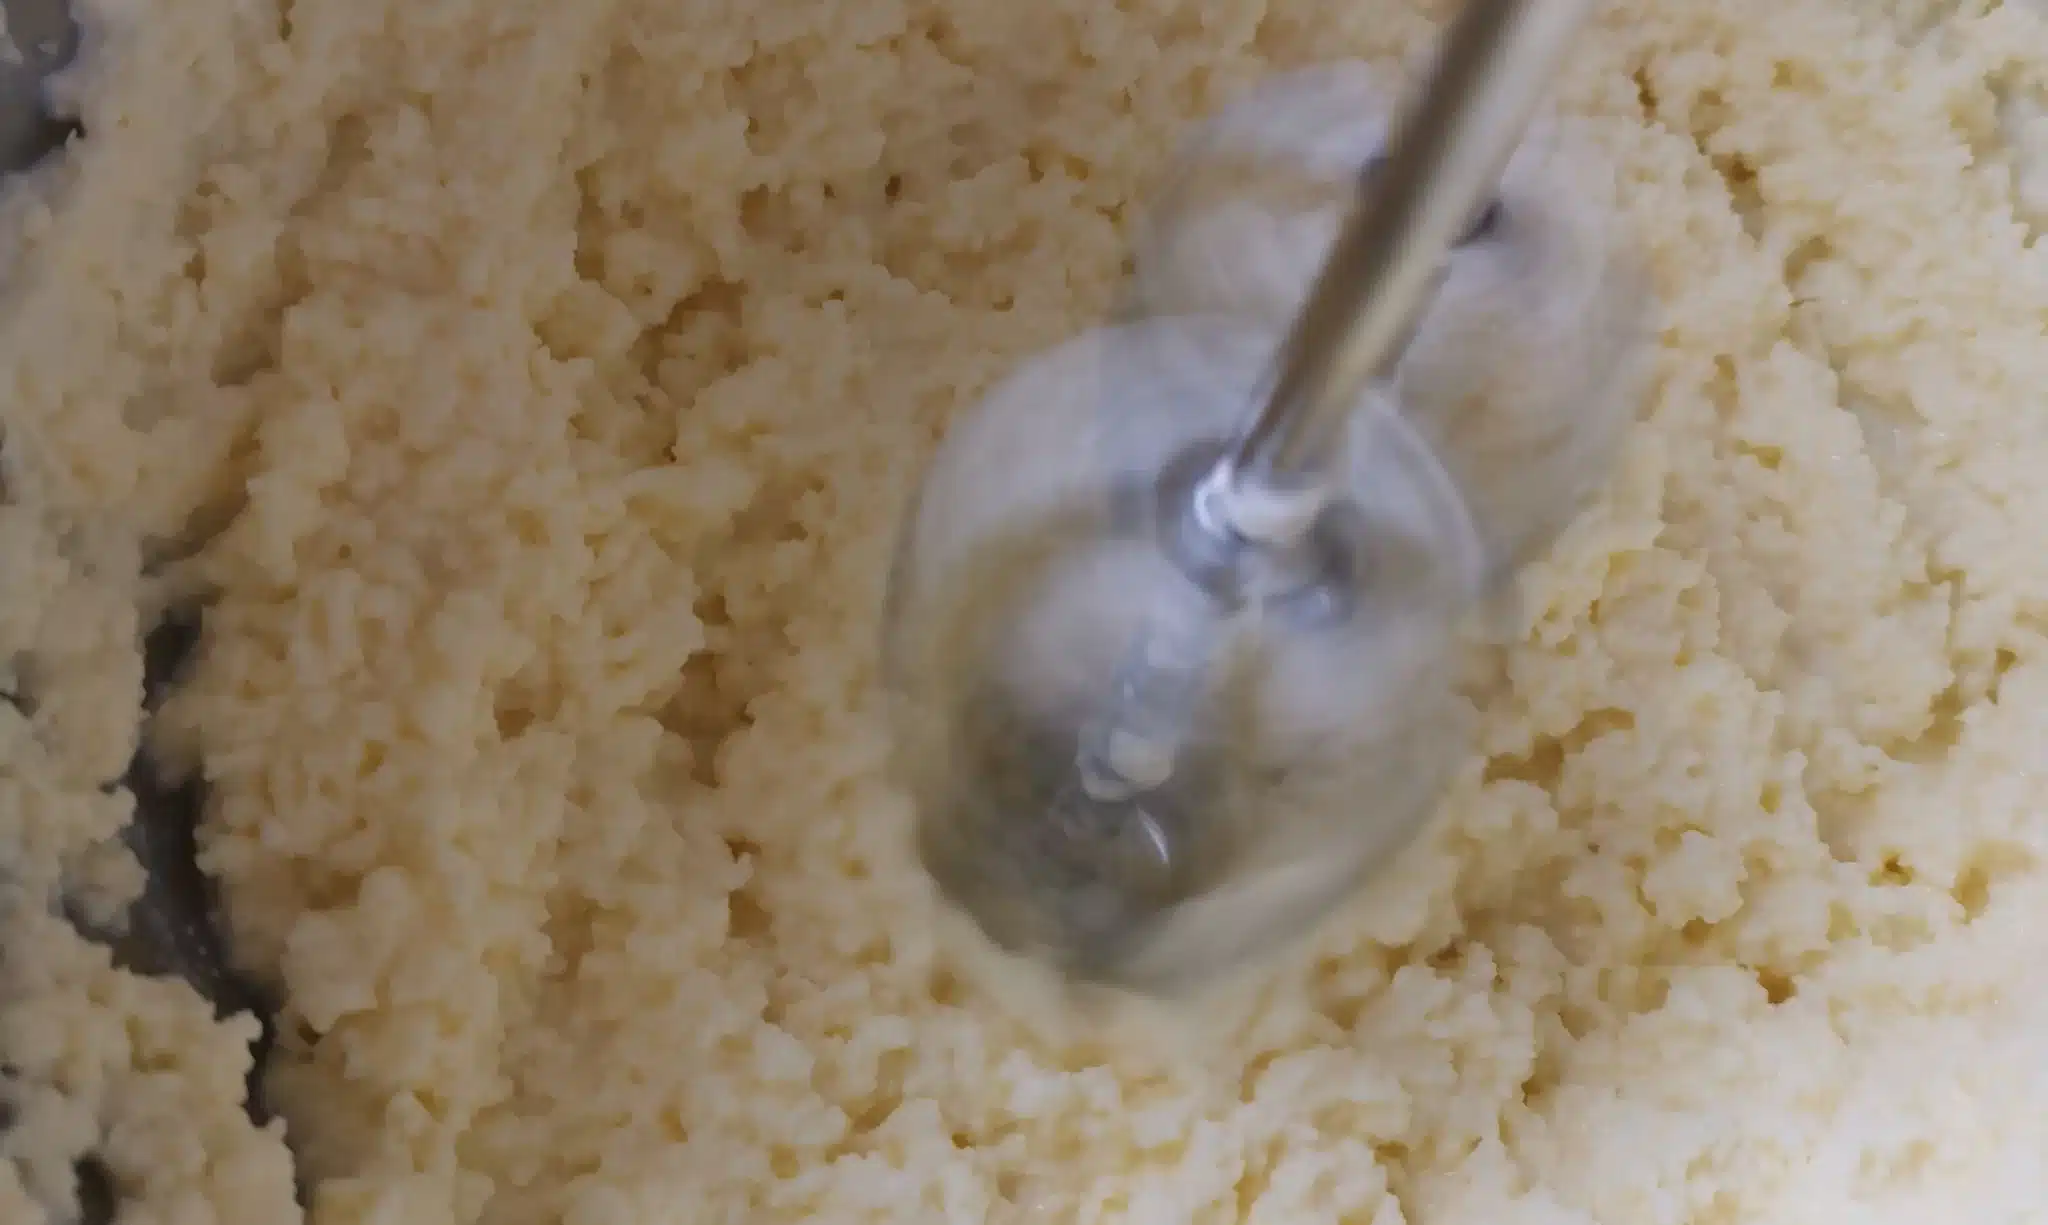
Cream at 16 minutes. See how the milk and the fat have separated? So cool.
Now, scoop up the butter with your hands and mush it together into a ball or block, or love heart. However you want to shape it.
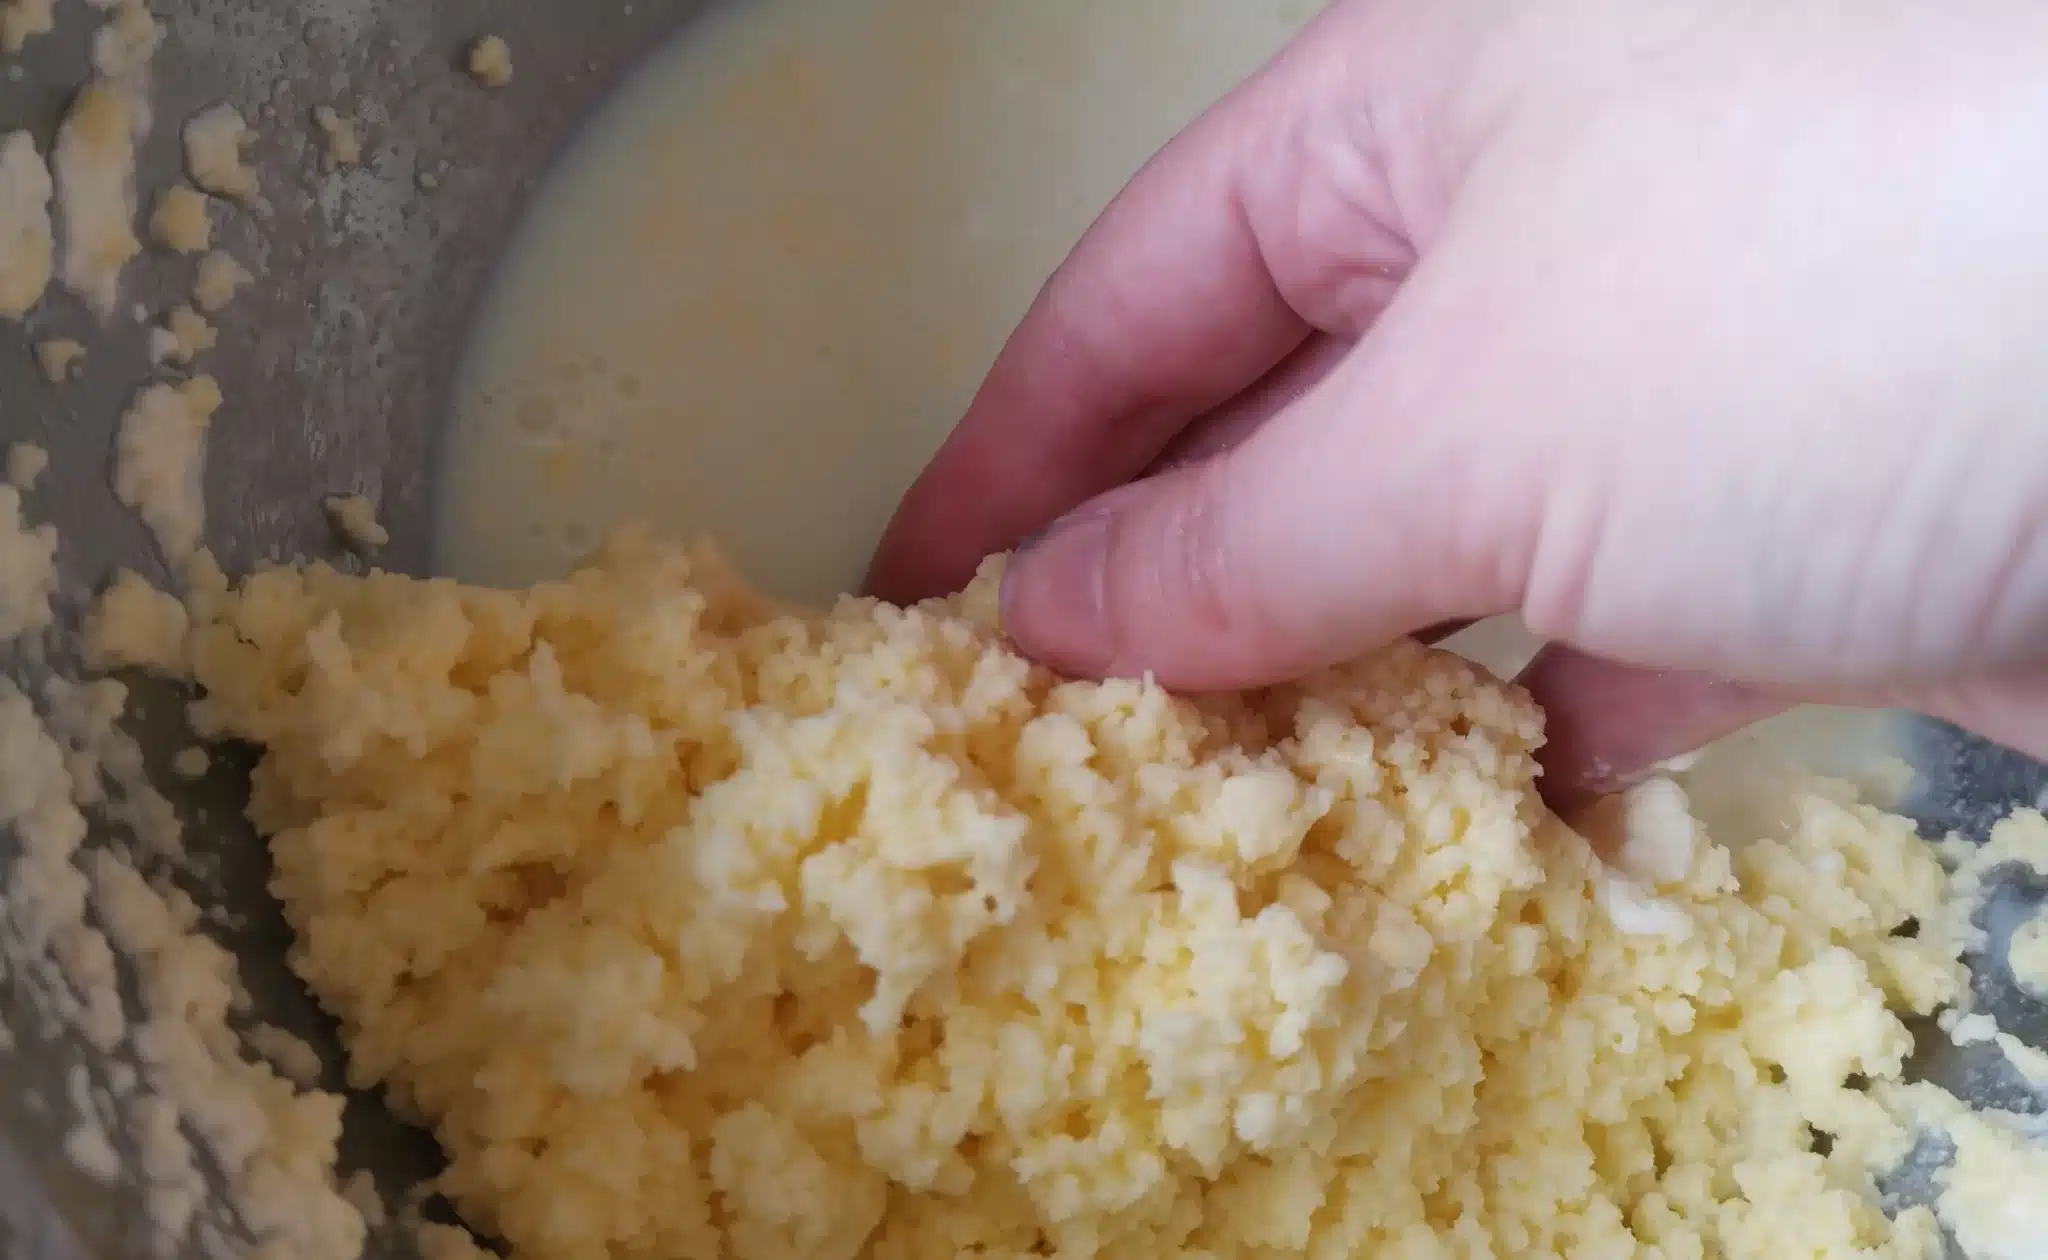
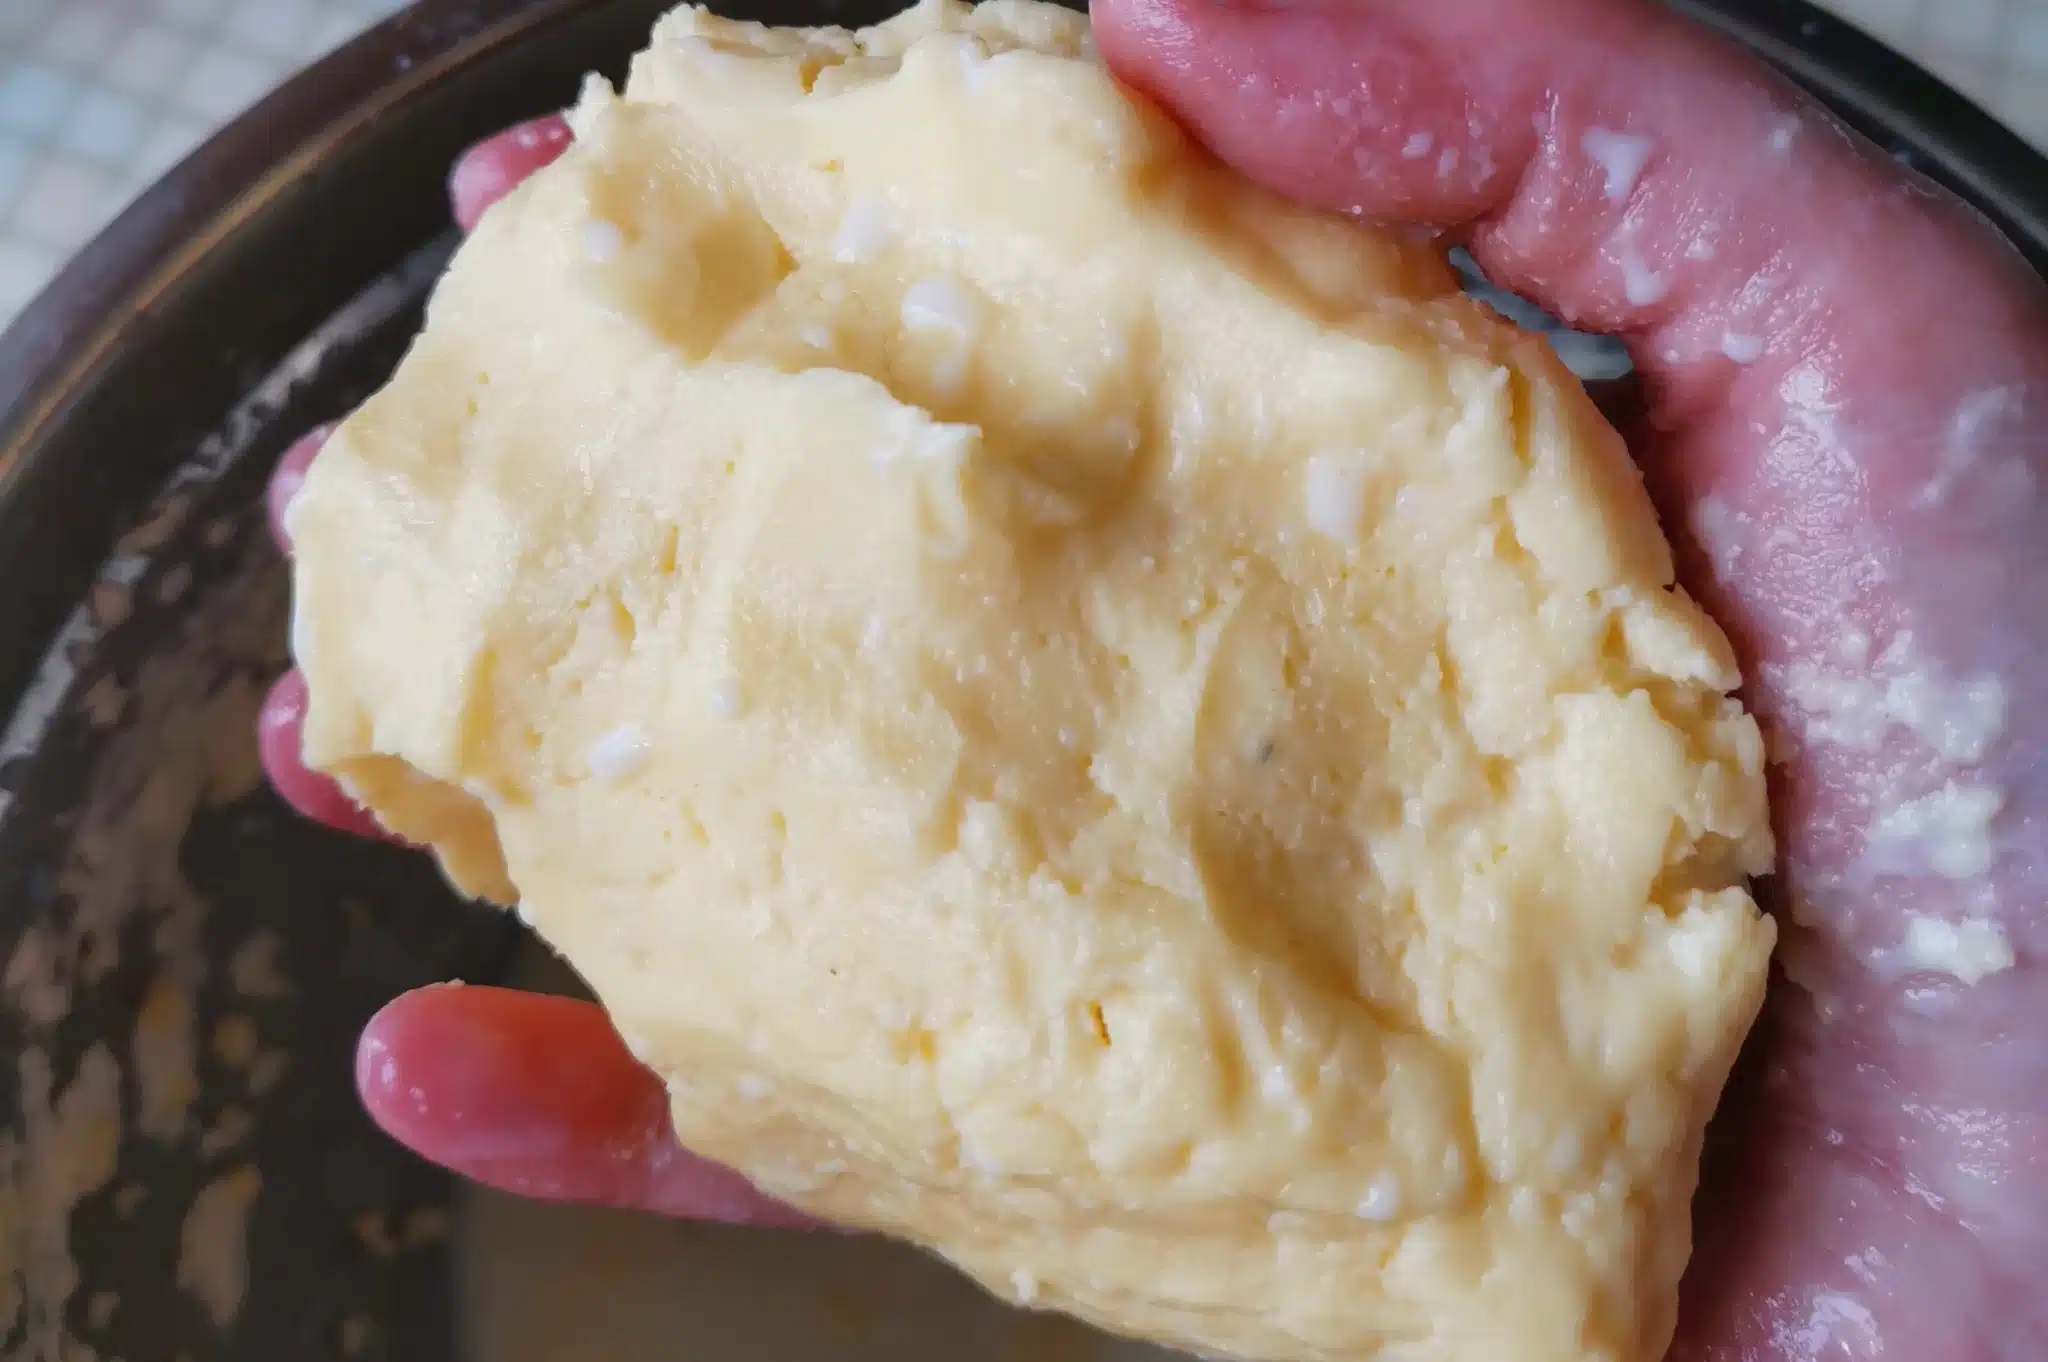
Get your bowl of iced water, and rinse the ball of butter in there to help it hold together and remove any buttermilk drips.
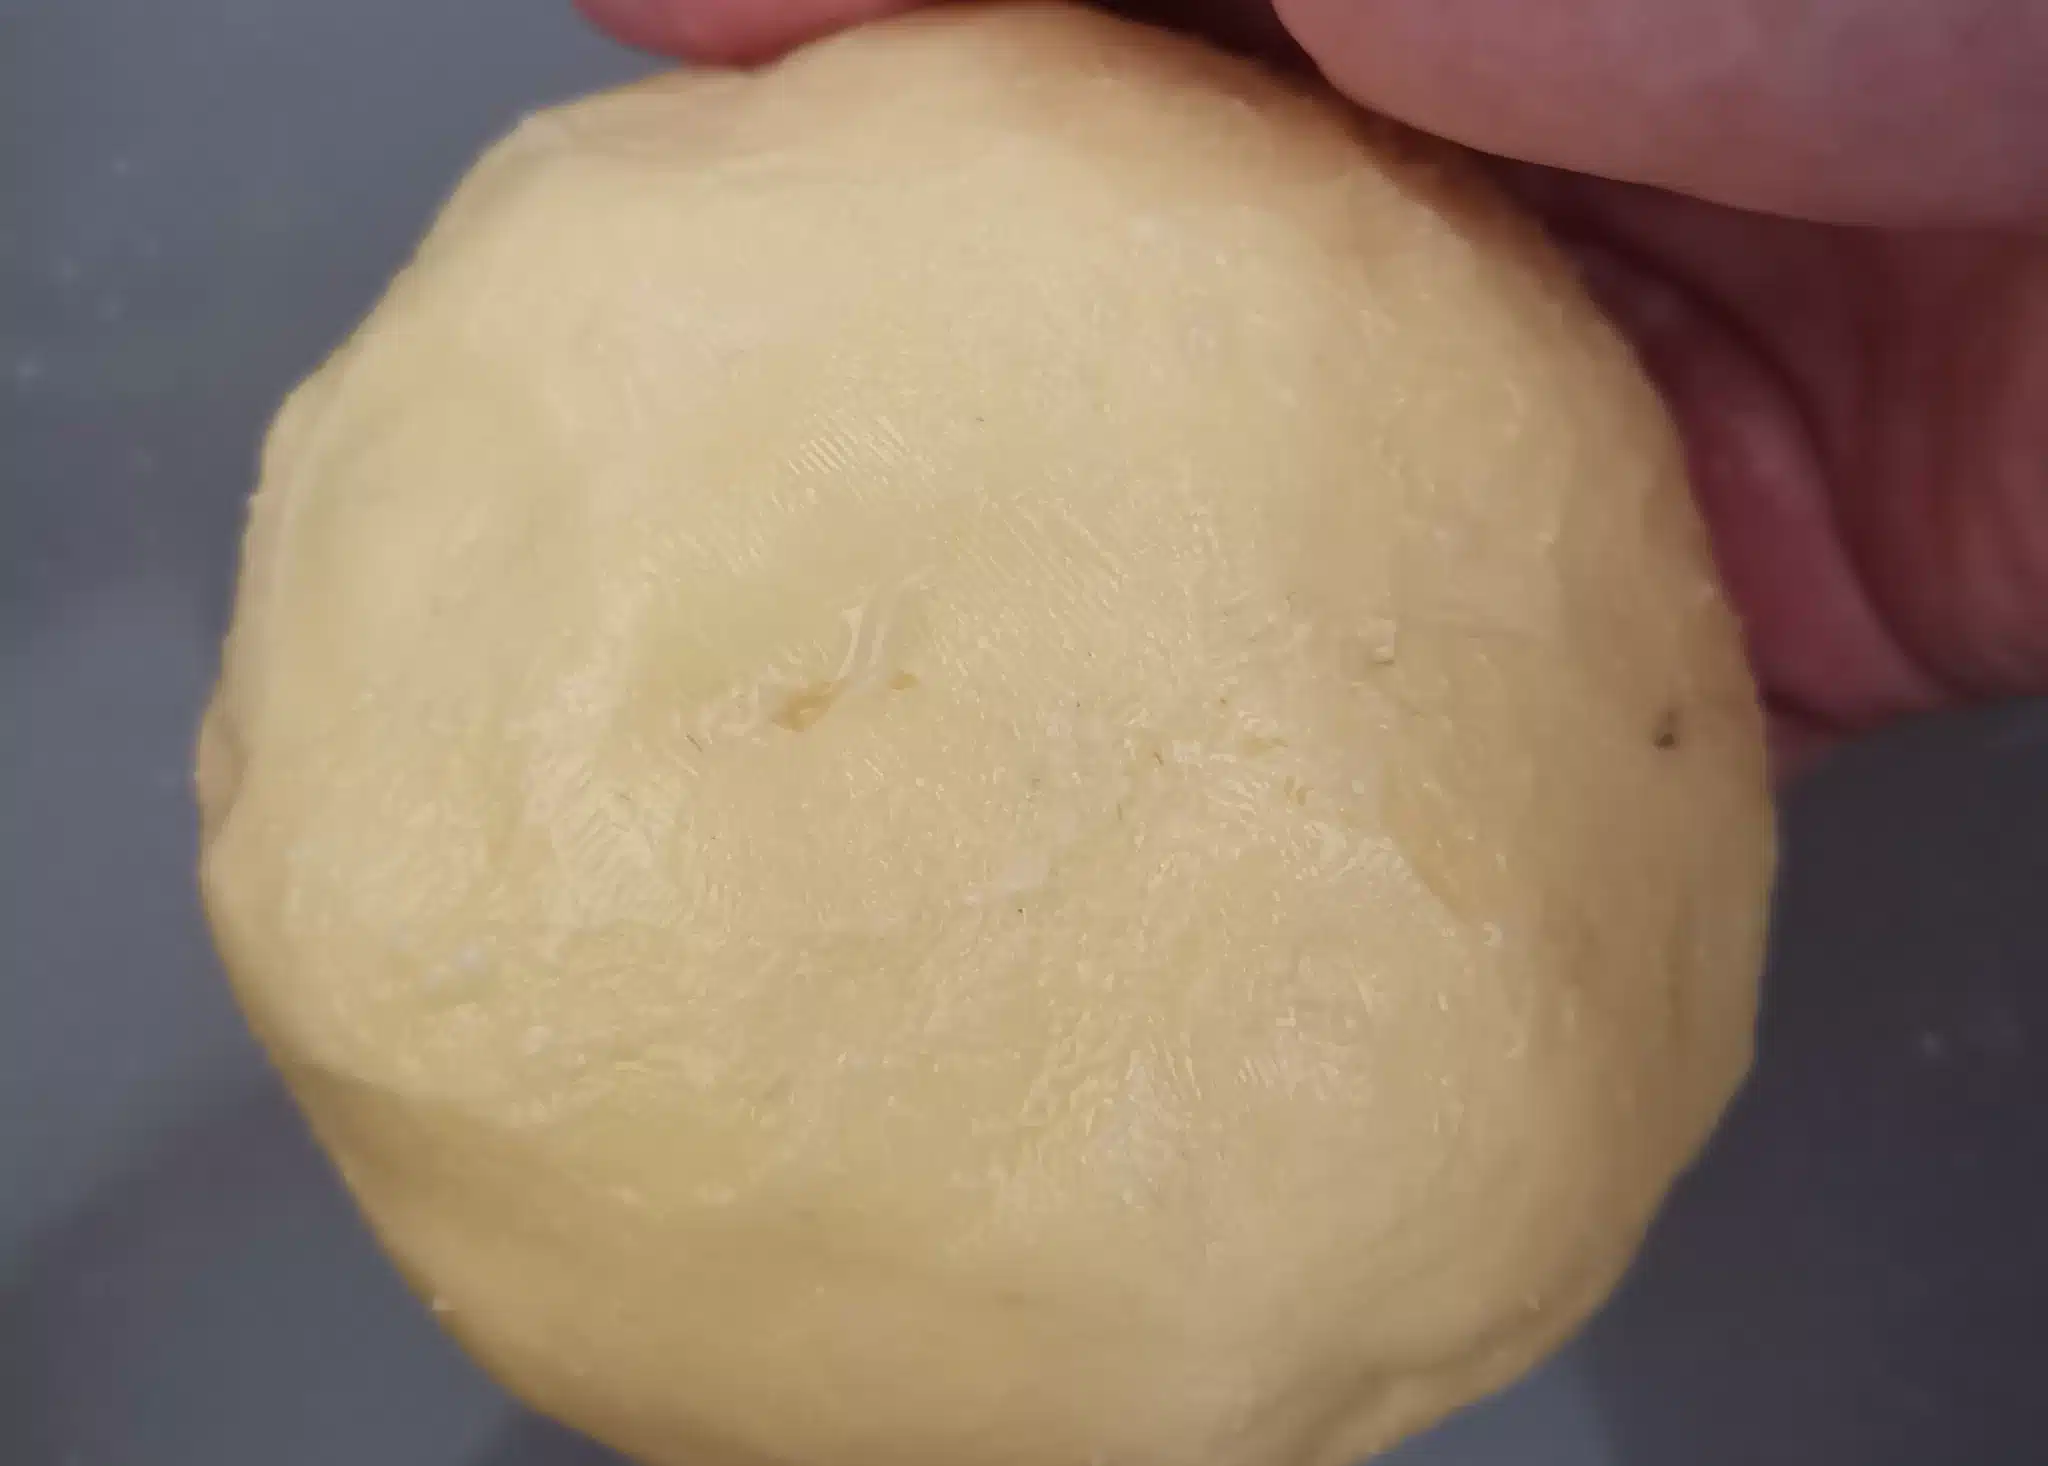
And that’s it! You now have homemade butter AND homemade buttermilk, which you can use to make pancakes or scones.

I made buttermilk scones, which were delicious with the fresh butter and jam.

Notes/Tips/Troubleshooting
- Buttermilk can be stored in the fridge for about 4 days
- The butter will last much longer as the fat and salt help preserve it, but it will also depend if you got most of the buttermilk out. 2-3 weeks is a reasonable estimate. If there is a bit of buttermilk in there still, it will sour faster.
- 2 cups of cream made me around 200 grams of butter, and about ¾ cup of buttermilk. Your yield may vary depending on how much of the buttermilk and butterfat you manage to separate.
Nutritional Facts
Values per 1 tbsp of butter (14.2g)
Calories 102
Total Fat 12g
Saturated fat 7g
Cholesterol 30.5mg
Sodium 1.6mg
Potassium 3.4mg
Total Carbohydrate 0g
Dietary fiber 0g
Sugar 0g
Protein 0.1g
Related Recipes
PrintHow to Make Your Own Butter
Making your own butter at home is super simple! All you need is heavy/whipping cream, a little salt, and an electric mixer.
Ingredients
2 cups of heavy cream or whipping cream
1/4 teaspoon of salt
Instructions
- Pour 2 cups of heavy cream and the salt into your mixing bowl.
- Blend with your electric hand mixer.
- Continue to blend past the point of stiff peaks in the cream until you see it turn yellow and separate from the buttermilk. This took me 16 minutes of continuous whipping to achieve.
- When you see the buttermilk is separate from the butterfat, you can stop mixing.
- Now, scoop up the butter with your hands and mush it together into a ball or block, or love heart. However you want to shape it.
- Get your bowl of iced water, and rinse the ball of butter in there to help it hold together and remove any buttermilk drips.
- And that’s it! You now have homemade butter AND homemade buttermilk, which you can use to make pancakes or scones.
- I made buttermilk scones, which were delicious with the fresh butter and jam.
FAQs
Homemade butter is great to spread on toast, biscuits, and even bagels. You can also use it in baking, such as cookies and cakes. If you prefer a savory dish, try using it to sautée vegetables or make sauces.
Butter does contain cholesterol and saturated fat, so some think it is unhealthy and try to avoid it. However, if you do not have any dietary limitations preventing you from eating butter, it can be nutritious in moderation. If you need a substitute, you can find that and more in our all-things-fat-and-oil hub!
That really depends on how much butter costs where you are and how much whipping cream costs. One liter/32 oz of 35% fat heavy cream should produce around 400g of butter, which is a little under a pound. With the price I paid for the cream compared to the cost of the butter, it was a little more expensive, though I did buy a somewhat expensive imported cream.


Leave a Comment